

Setup
Install fossabot on your GitHub or GitLab repositories so it can review pull requests and propose dependency upgrades.
Overview
fossabot connects to your source host as a GitHub App or a GitLab integration. You install and manage it from the fossabot dashboard at bot.fossa.com.
Once a repository is connected, fossabot runs automatically on new pull or merge requests. You can also trigger it manually:
- GitHub: comment
@fossabot analyzeon the pull request. - GitLab: comment
/fossabot analyzeon the merge request.
Connecting fossabot to GitHub
For repositories on github.com or GitHub Enterprise Cloud, install the GitHub App from bot.fossa.com. Your engineers keep viewing analysis and pull requests in GitHub. Each repository can be set to trigger fossabot automatically or manually.
GitHub Enterprise Server or Cloud Data Residency
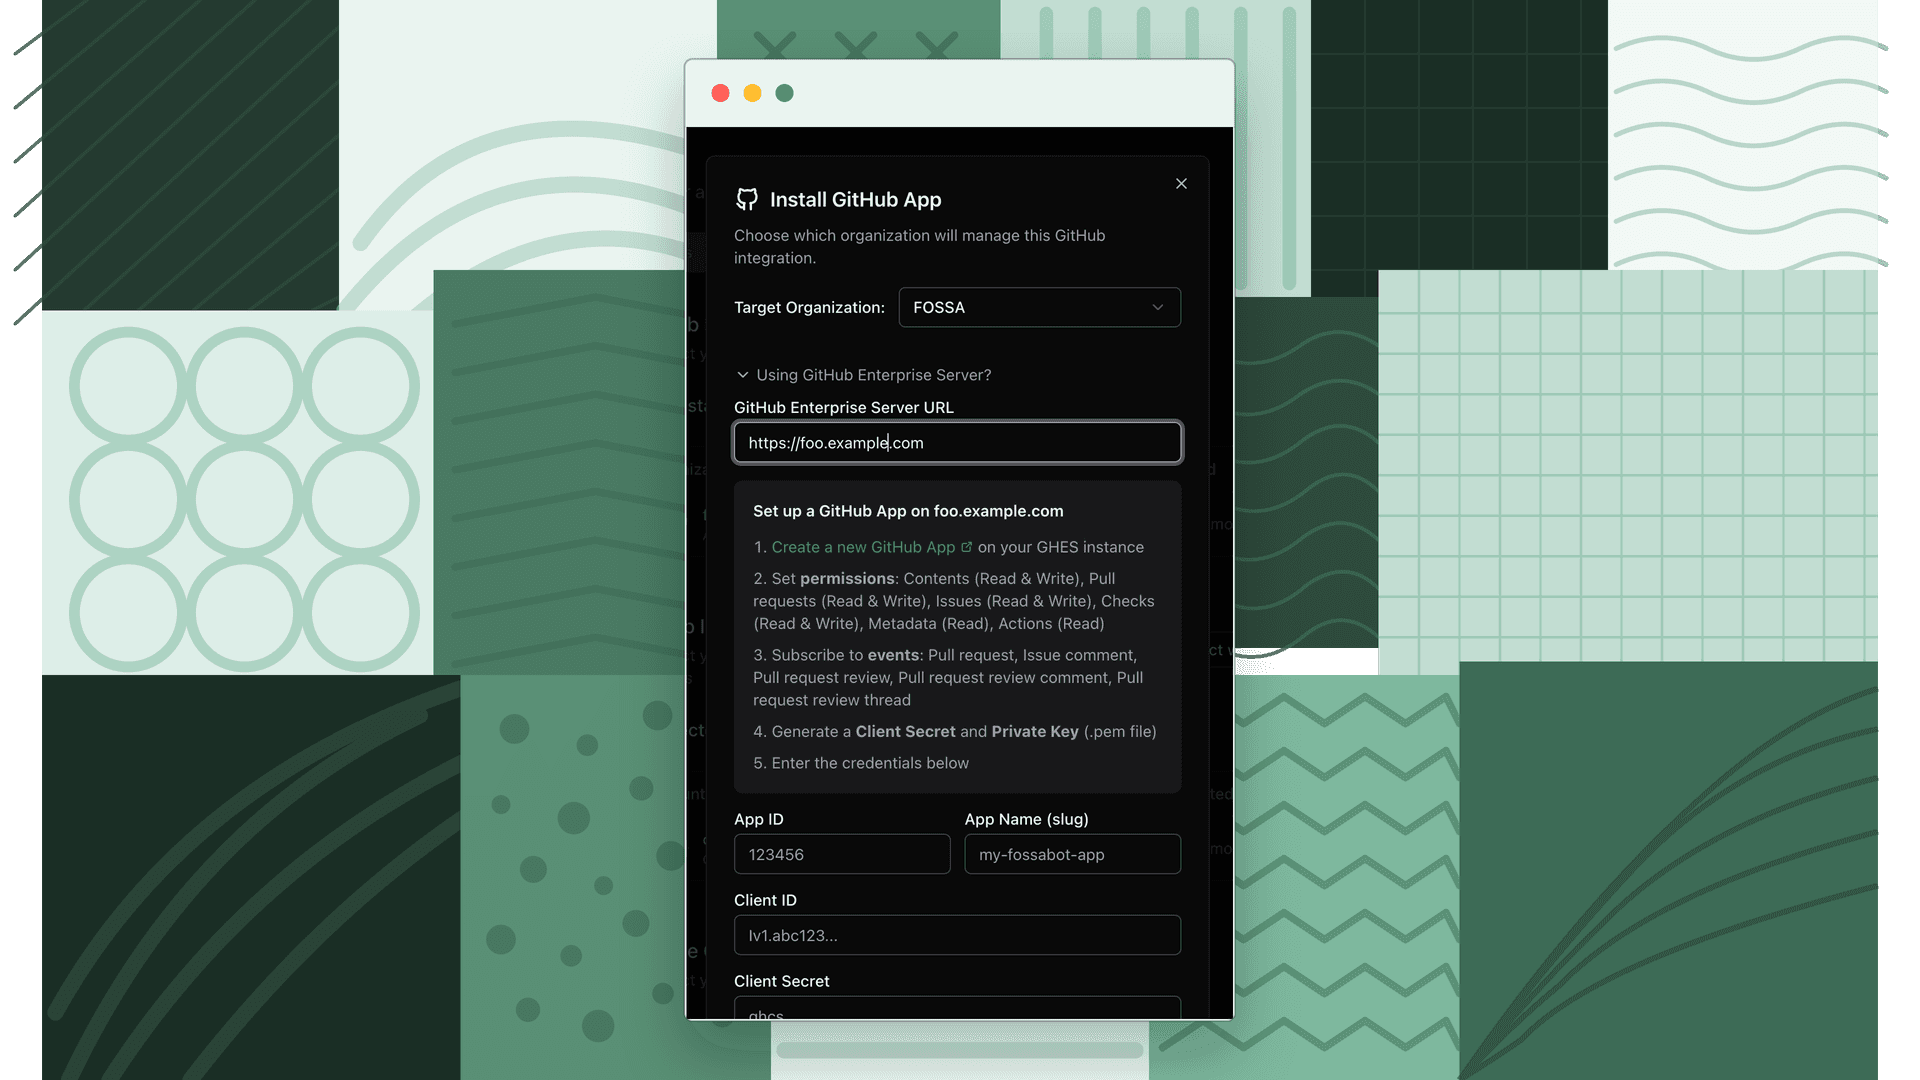
GitHub Enterprise Server (GHES) and GitHub Enterprise Cloud with Data Residency (GHEC-DR) require the GitHub App to be registered within your instance, so you create your own app and register its credentials with fossabot. The steps are the same for both. Only your instance URL differs (your GHES server host such as https://github.your-company.com, or your *.ghe.com tenant for GHEC-DR).
- 1
Start in fossabot
Log in to bot.fossa.com, go to Settings > Integrations > Install GitHub app, expand Using GitHub Enterprise Server or Cloud Data Residency?, and enter your instance URL.
- 2
Create a GitHub App on your instance
Create the app under the organization or enterprise that should own it:
- Organization:
https://<your-instance>/organizations/<your-org>/settings/apps/new - Enterprise:
https://<your-instance>/enterprises/<your-enterprise>/settings/apps/new
An enterprise-owned app can only be installed on organizations within that enterprise.
- Organization:
- 3
Configure the app
Basic information
- GitHub App name:
fossabot(or any name; fossabot uses it for its@fossabotmentions) - Homepage URL:
https://bot.fossa.com
Identifying and authorizing users: add both Callback URLs, and leave Request user authorization (OAuth) during installation and Enable Device Flow unchecked:
https://bot.fossa.com/api/auth/callback/githubhttps://vcs.fossa.com/api/v1/connections/github/oauth/callback
Post installation
- Setup URL:
https://vcs.fossa.com/api/v1/connections/github_app/app/callback - Leave Redirect on update unchecked.
Webhook
- Check Active and keep Enable SSL verification on.
- Webhook URL:
https://vcs.fossa.com/webhooks/github - Webhook secret: generate one (you'll paste it into fossabot in the next steps).
Permissions and events: set them as listed under Required permissions below.
- GitHub App name:
- 4
Generate credentials
Generate a Client secret and a Private key (download the
.pemfile). - 5
Register with fossabot
Back in the Install GitHub app form, enter your App ID, App name (the slug from the app's URL), Client ID, Client Secret, Private Key (the contents of the
.pem), and Webhook Secret, then select Register & Install. - 6
Install and allowlist
fossabot redirects you to your instance to install the app, then choose the repositories fossabot should access. Make sure your network allows FOSSA to reach your instance and receive webhooks (see IP Space Allowlisting).
Required permissions
The fossabot GitHub App requests these repository permissions:
| Permission | Access |
|---|---|
| Actions | Read |
| Administration | Read |
| Checks | Read & Write |
| Code scanning alerts | Read |
| Commit statuses | Read |
| Contents | Read & Write |
| Dependabot alerts | Read |
| Issues | Read & Write |
| Metadata | Read (auto-selected) |
| Pull requests | Read & Write |
| Repository security advisories | Read |
| Webhooks | Read & Write |
One organization permission:
| Permission | Access |
|---|---|
| Members | Read |
It subscribes to these events:
- Issues
- Issue comment
- Pull request
- Pull request review
- Pull request review comment
- Pull request review thread
- Push
Bulk onboarding of repos
If you have hundreds or thousands of repositories, onboard them in bulk with a scoped token instead of installing one repository at a time.
- 1
Generate a token
Create a personal access token (classic) with the
reposcope, using a GitHub account that has admin access to the target repositories. ThePUTendpoint used below only works for a classic PAT (ghp_) with thereposcope; a fine-grained or user-to-server (ghu_) token is rejected with a 404. - 2
Find your repository IDs
Bulk onboarding uses numeric repository IDs (for example
1296269), notowner/name. List them with the GitHub CLI:gh api --paginate /orgs/<ORG>/repos -q '.[] | "\(.id) \(.full_name)"' - 3
Add each repository
Using the scoped token, add each repository to the installation:
export GH_TOKEN="ghp_xxxxxxxxxxxxxxxxxxxx"
gh api --method PUT \
  /user/installations/<INSTALLATION_ID>/repositories/{REPO_ID}
Connecting fossabot to GitLab
For GitLab, cloud or self-managed, connect from bot.fossa.com using OAuth or a GitLab access token. Your engineers keep viewing analysis and merge requests in GitLab. Each repository can trigger fossabot automatically or manually with a /fossabot analyze comment or from the UI.
GitLab access token requirements
If you connect with an access token, it needs the following scopes.
Legacy scopes: api, read_repository, write_repository
Fine-grained scopes:
| Category | Scopes and permissions |
|---|---|
| CI/CD | Job (Read, Run Job); Pipeline (Read) |
| Repository | Branch (Read, Create, Delete); Code (Read); Commit (Read, Create); Merge Request (Read, Create, Update); Repository (Read); Tag (Read) |
| Group | Group (Read) |
| Project | Project (Read) |
What's next
- fossabot for Dependency Upgrades: Configure how fossabot proposes and fixes upgrades.
- Supported Ecosystems & Tools: Confirm your languages are covered and configure private registries.