Release Groups
This page describes how to create and edit your organization's release groups.
Release Groups let you bundle multiple projects together so that you can
apply a shared policy and track issues across the entire collection. Each release acts as a snapshot of the included project revisions(commits/builds) at that point in time.
This functionality needs to be enabled for your organization. If you would like release groups turned on please reach out to [email protected].
Creating Release Groups
To create a release group from Release Groups Table:
- Navigate to Release Groups
- Select
New Release Group
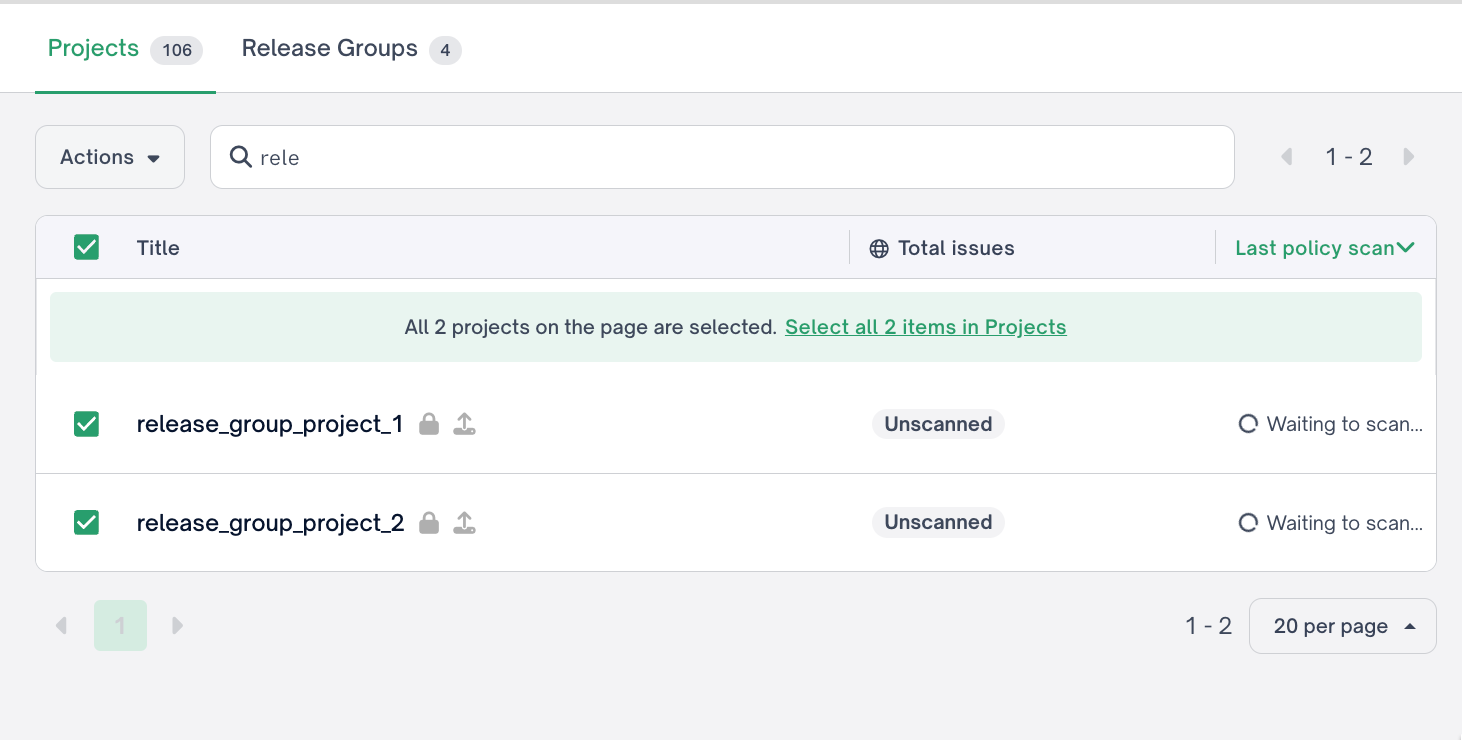
To create a release group from Projects Table:
-
Select the projects you want to add

-
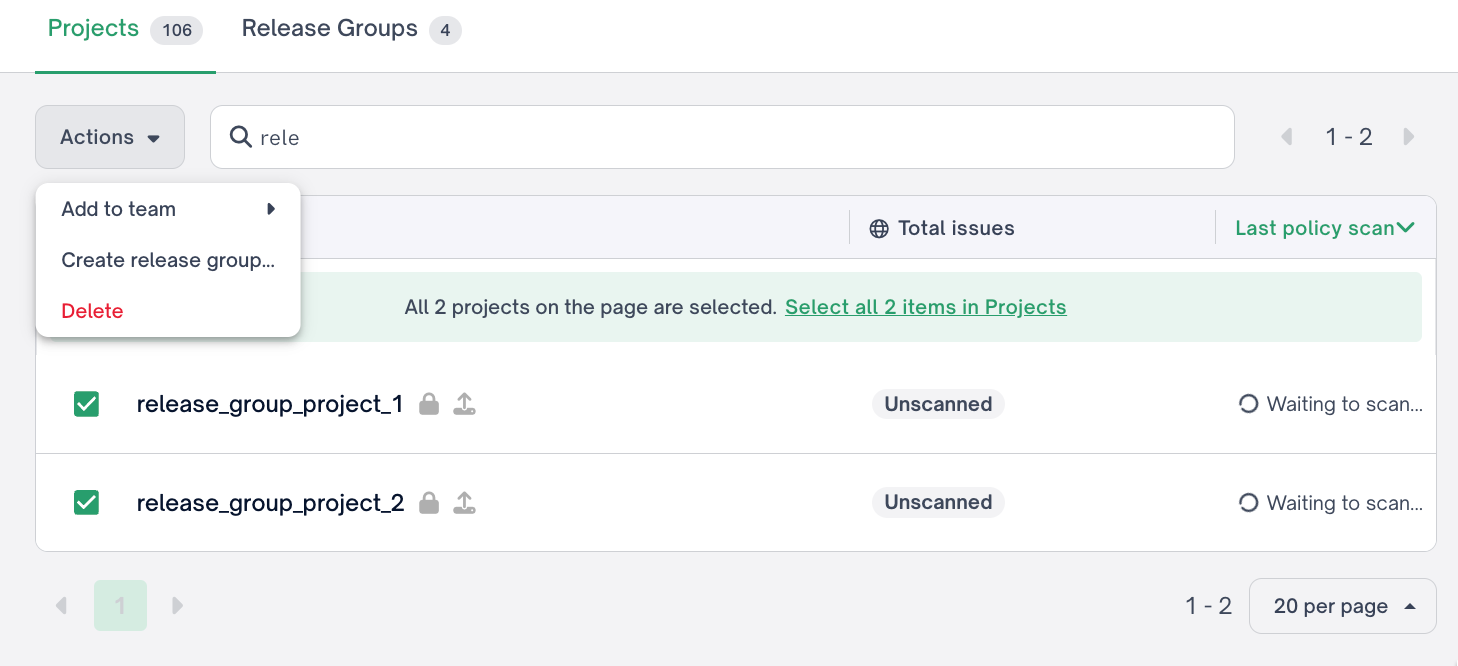
Click the actions button.
-
Click create release group

-
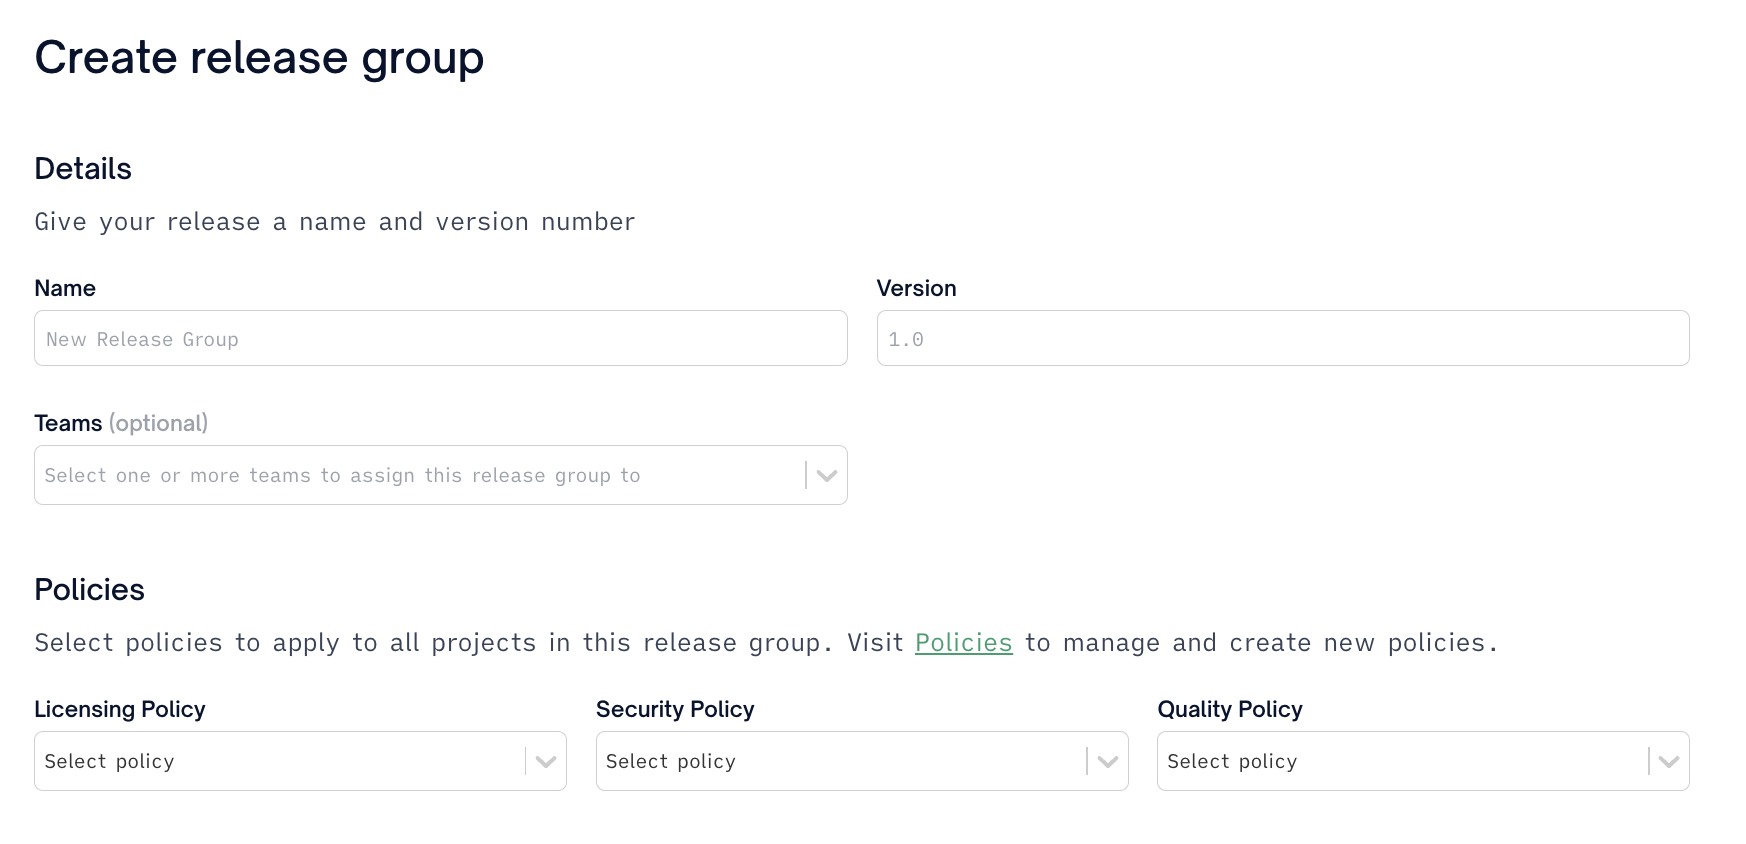
On the next screen, you will be able to edit the release group's name, release version, as well as add any applicable policies. Note any policy not selected will use the organization default policies for that product type (licensing, security, quality)
- Here you can give your RG a:
- Name
- Name of your RG
- Version
- Version of the first
Releasein your RG
- Version of the first
- Team
- Teams you would like to assign your RG to. Note any projects unassigned to the selected team will also be assigned to the Team upon RG creation
Next, if on an applicable tier, you may assign custom Policies for Licensing, Security, or Quality. Note if no policies are selected the RG will use the organization default policies
- Teams you would like to assign your RG to. Note any projects unassigned to the selected team will also be assigned to the Team upon RG creation
- Name
- Here you can give your RG a:
-
Next you can select the Release Group Privacy settings, if applicable, for Public or Private access. Note Free or Business tier users will not see this option as private SBOM portal is an enterprise only option
-
Please see SBOM Portal and Distribution for additional details
-
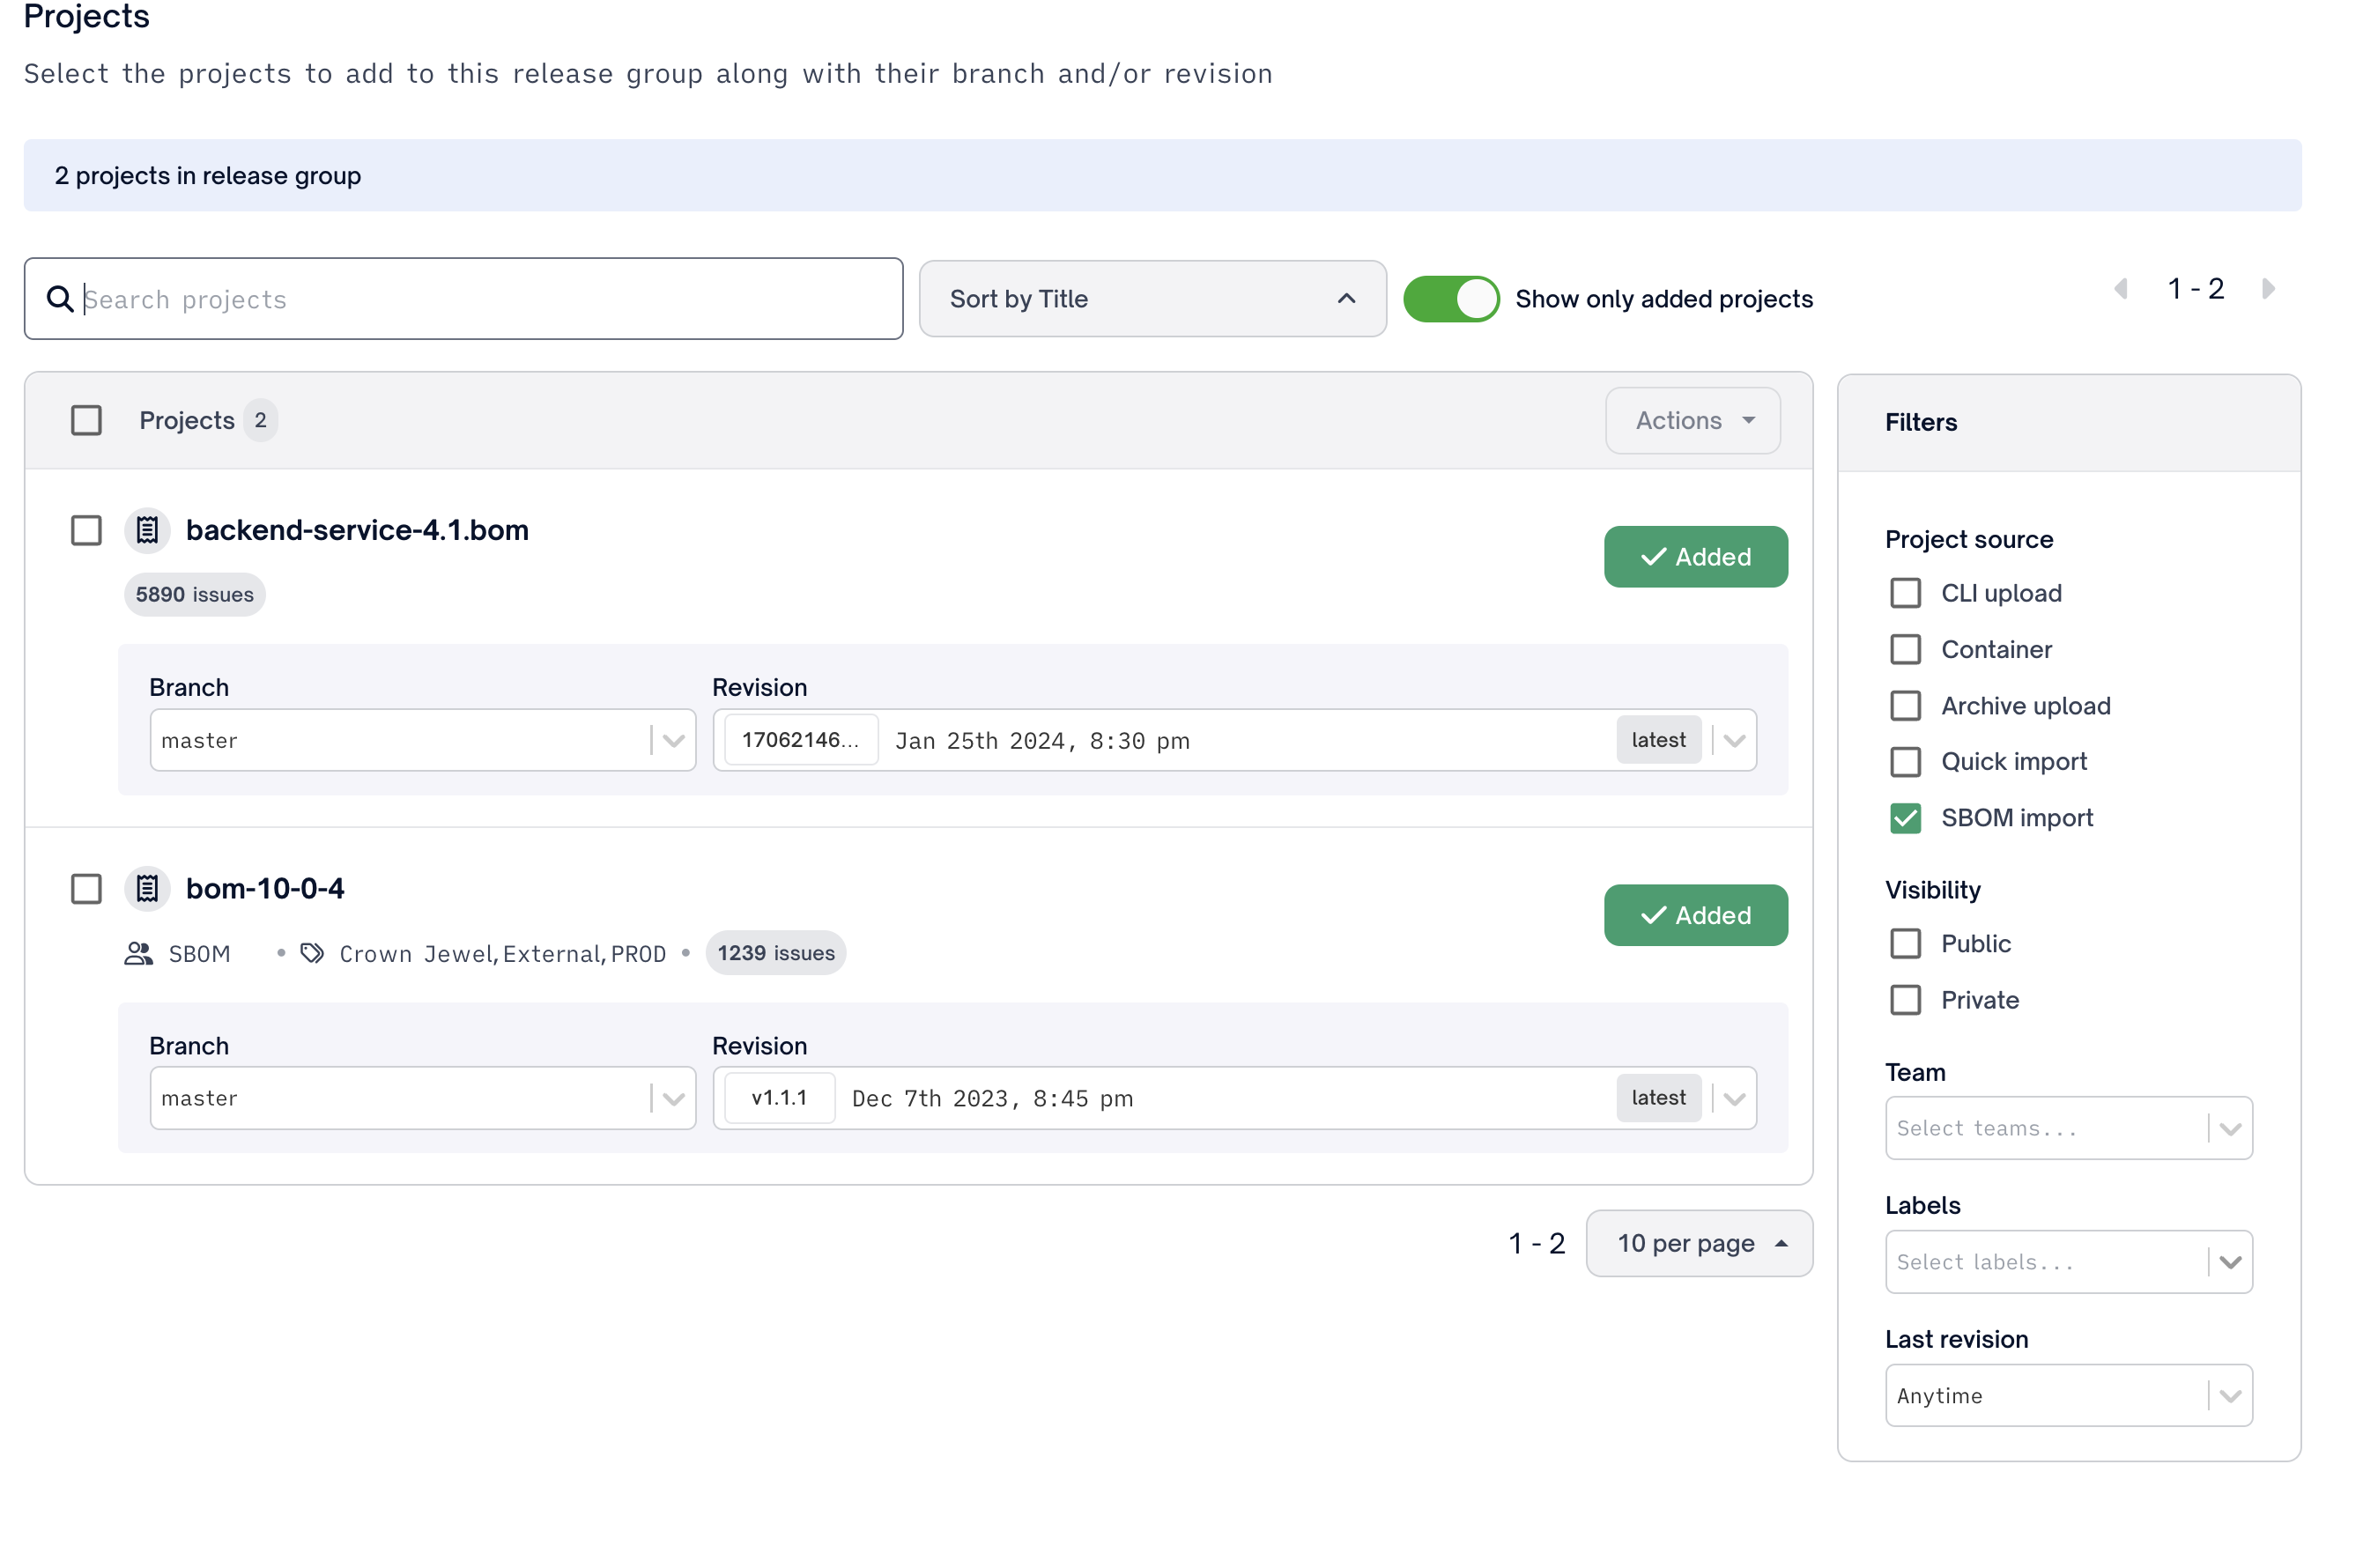
Select your desired projects to include in your release group either
- Select each desired project to include in your RG by selecting the
Addaction next to the desired project. Note these can be any type of project including CLI uploads, Quick import projects, SBOMs, or containers. - You can add projects in bulk by selecting many projects and choosing
Actions>add to release group - Once selected you will be prompted to pin a specific
branchandrevision(project analysis, commit or version) to be included in the firstRelease.- You will be prompted to select a
branchandrevisionfor
- You will be prompted to select a

- Select each desired project to include in your RG by selecting the
Creating and Managing Releases
A release acts as a snapshot of the included project revisions(commits/builds) at that point in time. After creating your initial release during Release Group creation creating release groups you can Edit or Clone this release.
- Editing a release allows a user to edit the version, project(s), branch(es), and revision(s)
- Cloning a release creates a new release based on an existing project(s), branch(es), and revision(s) in the release group.
Creating New ReleaseAs an opportunity to expedite release creation workflows. Cloning is the primary way a user will create a new release. You will have an opportunity to add or remove any projects from the cloned release before saving your new release.
Actions
Within the action menu there are three options:
- Add to release group
- Adds the selected projects to the release group
- Remove from release groups
- Removes the selected projects from the release group
- Set revision to latest
- Automatically selects the latest revision for each project selected in the release group
Updated 7 months ago

