Atlassian Jira
Integrating Atlassian's Issue Tracker Jira with FOSSA
This guide focuses on integrating FOSSA with Atlassian Jira Cloud. While the steps are designed for Jira Cloud, they may also work for Jira Server or on-premises versions.
FOSSA's Jira integration provides two key capabilities:
- Export FOSSA issues as new tickets in Jira.
- Automatically resolve linked FOSSA issues when they are marked as resolved in Jira.
Setup and Configuration
To configure the Jira integration features, the user or service account in Jira needs the following permissions:
- Export issues: Requires basic Jira product access (the ability to use Jira and interact with issues).
- Resolve issues via webhook: Requires Jira Administrator (Administer Jira) or Product Admin for Jira permissions to create and manage webhooks.
In most cases, especially in enterprise environments, you may need to involve your IT or Jira administrators to grant these permissions or create the appropriate roles. For details on Jira's default groups, roles, and permissions, see Atlassian's guide: Default groups and permissions
You can also create a dedicated permission group that inherits both Jira product access and administrator-level permissions so the integration user has access to both features.
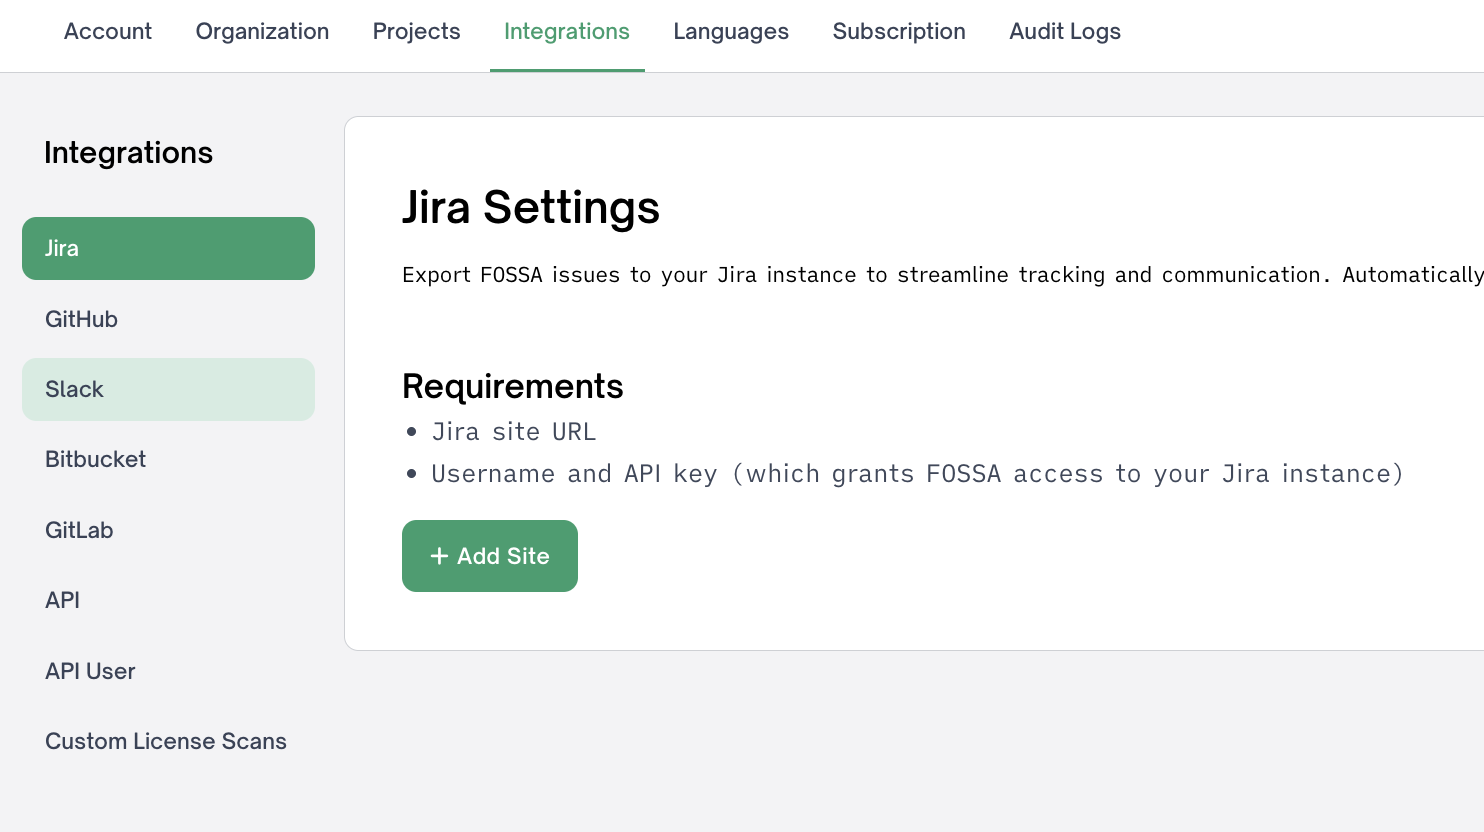
To integrate Jira with FOSSA, head over to the Jira integration settings page (/account/settings/integrations/jira). This page allows you to configure your Jira site integration(s). Start by clicking Add Site if you have not set it up previously.
Project Key(s)
Each Jira project has a project key, typically a short 3–4 character identifier.
- You can find the key in the project URL or in the project summary details panel (under Key).
- The key also serves as the prefix for all issue IDs within that project (e.g.,
PROJ-123).
You can specify multiple project keys (e.g., one for frontend and one for backend teams). However, at least one project key is required.
Issue Types and Labels
-
Issue Types: These must exactly match the issue types configured in your Jira instance. Common defaults include
"Bug","Task", or"Story". -
Labels: Labels are free-form tags. They don’t need to exist in Jira beforehand, so you can create any label you want for FOSSA-exported issues.
Name and Site URL
Give your Jira integration a unique name (useful if you're configuring multiple Jira integrations), then enter your Jira site URL.
Use only the base URL — for example, in Jira Cloud this might look like: your-org.atlassian.net
Project Key(s)
Each Jira project has a project key, typically a short 3–4 character identifier.
- You can find the key in the project URL or in the project summary details panel (under Key).
- The key also serves as the prefix for all issue IDs within that project (e.g.,
PROJ-123).
You can specify multiple project keys (e.g., one for frontend and one for backend teams). However, at least one project key is required.
Issue Types and Labels
-
Issue Types: These must exactly match the issue types configured in your Jira instance. Common defaults include
"Bug","Task", or"Story". -
Labels: Labels are free-form tags. They don’t need to exist in Jira beforehand, so you can create any label you want for FOSSA-exported issues.
Tip:Users often like all FOSSA exported issues to use the same label or issue type for easier tracking, so perhaps create a new "FOSSA" label or issue type within your Jira site.
Credentials
To integrate FOSSA with Jira, you need to authenticate using a Jira user account with permission to create and resolve issues. It's recommended to create a dedicated "FOSSA user" within your Jira instance for this purpose.
API Token: Jira Cloud
FOSSA uses a Jira user’s API token to authenticate and perform actions on that user’s behalf.
Note: FOSSA does not currently support scoped API tokens.
The Jira user must have permissions to create, resolve, and modify issues in the relevant projects.
To create a new API token, follow Atlassian's guide on managing API tokens .
API Token: Jira Server/On-prem
For Jira Server/on-prem users, you will need to create a new user for FOSSA within your Jira instance.
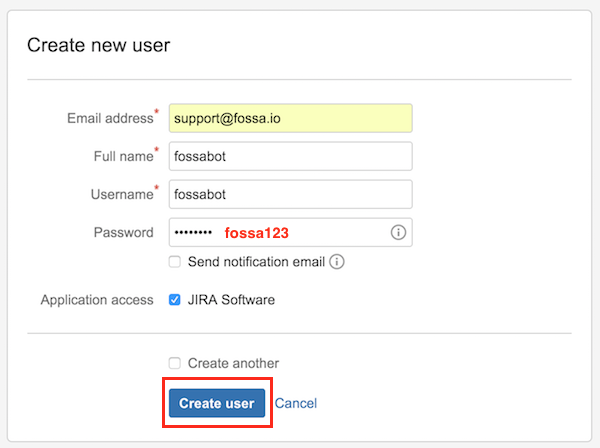
- Create a new user:
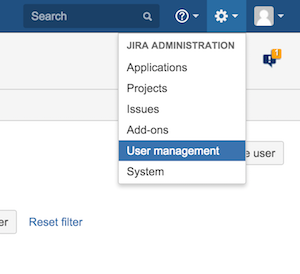
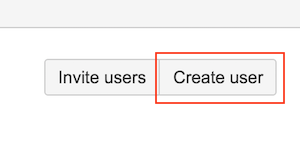
Specify whatever username/password you'd like in the screen above. By default, we keep the combination fossabot/fossa123.
- Add user as an admin


Custom Fields
IMPORTANTFOSSA supports exporting issues with simple text-based custom fields. To configure a custom field in Jira, follow this guide.
You can integrate custom fields with FOSSA by doing the following on the Jira settings page:
- In the Jira integration settings page, click Add Field under the custom fields section.
- Enter the Field ID of the custom field. You can find this ID in your Jira site by clicking on:
- Project Settings

- In the sidebar: Issues > Fields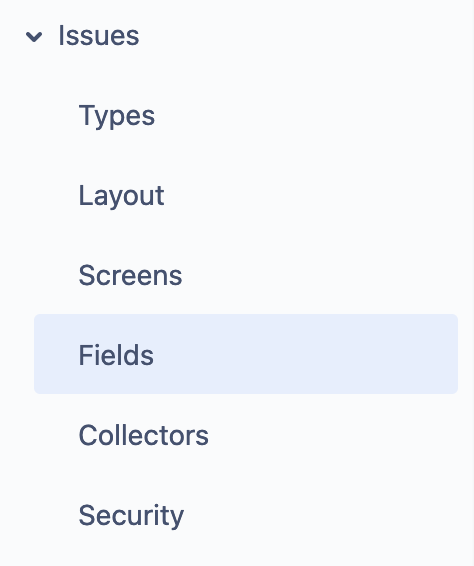
- Clicking on the Edit button at the top right of the table (the pencil).
- Click Edit on the field you wish to add.
- In the URL, you will find something like `orderableFieldId=customfield_10031`
- All you need is the numeric portion a the end of the ID (eg: `10031`)- Add a display name (usually the same name the field has in Jira).
- Optionally include a default value for the field.
- If you want all issues to include this field when exported from FOSSA, ensure that "required" is selected.
Headers
If your Jira configuration requires additional request headers (perhaps for authentication), you can set them at the bottom of the Jira settings page. This is an advanced feature and you probably don't need to worry about it if you are integrating with Jira Cloud.
Webhooks
Once you save your Jira site settings, a webhook URL will be generated for you. FOSSA requires webhooks to sync issue status with Jira. This means that when a user closes an issue in Jira, the corresponding issue will be resolved in FOSSA.
In order to tell Jira about this webhook, follow these steps:
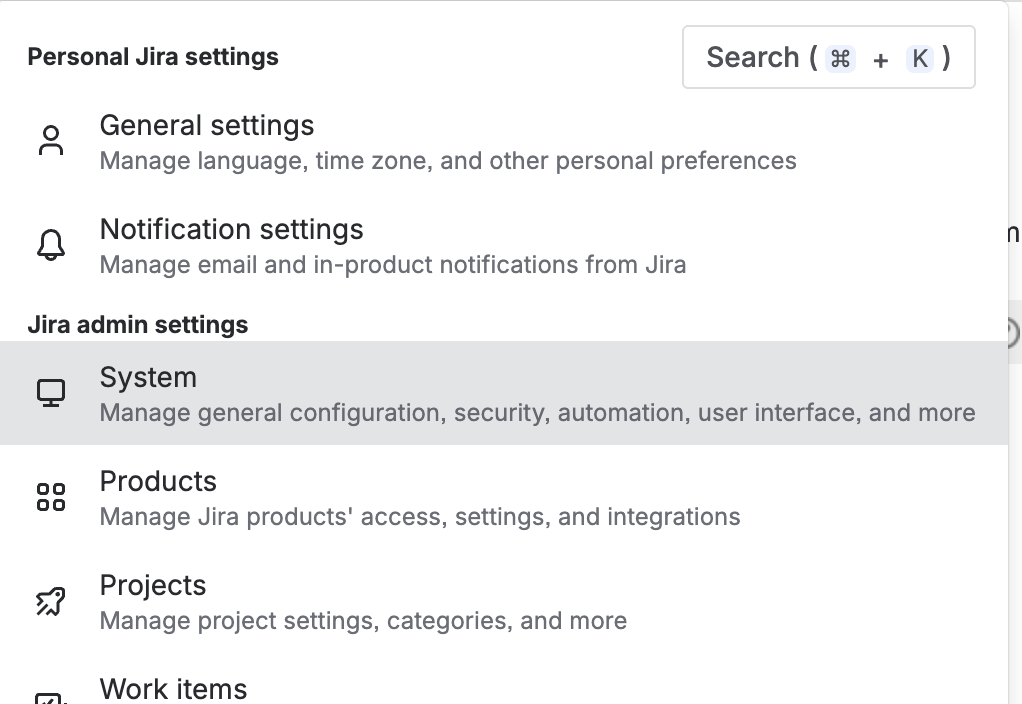
In Jira, navigate to the Settings gear on the top right, then under Jira admin settings click System
Then, in the left panel under Advanced click WebHooks.
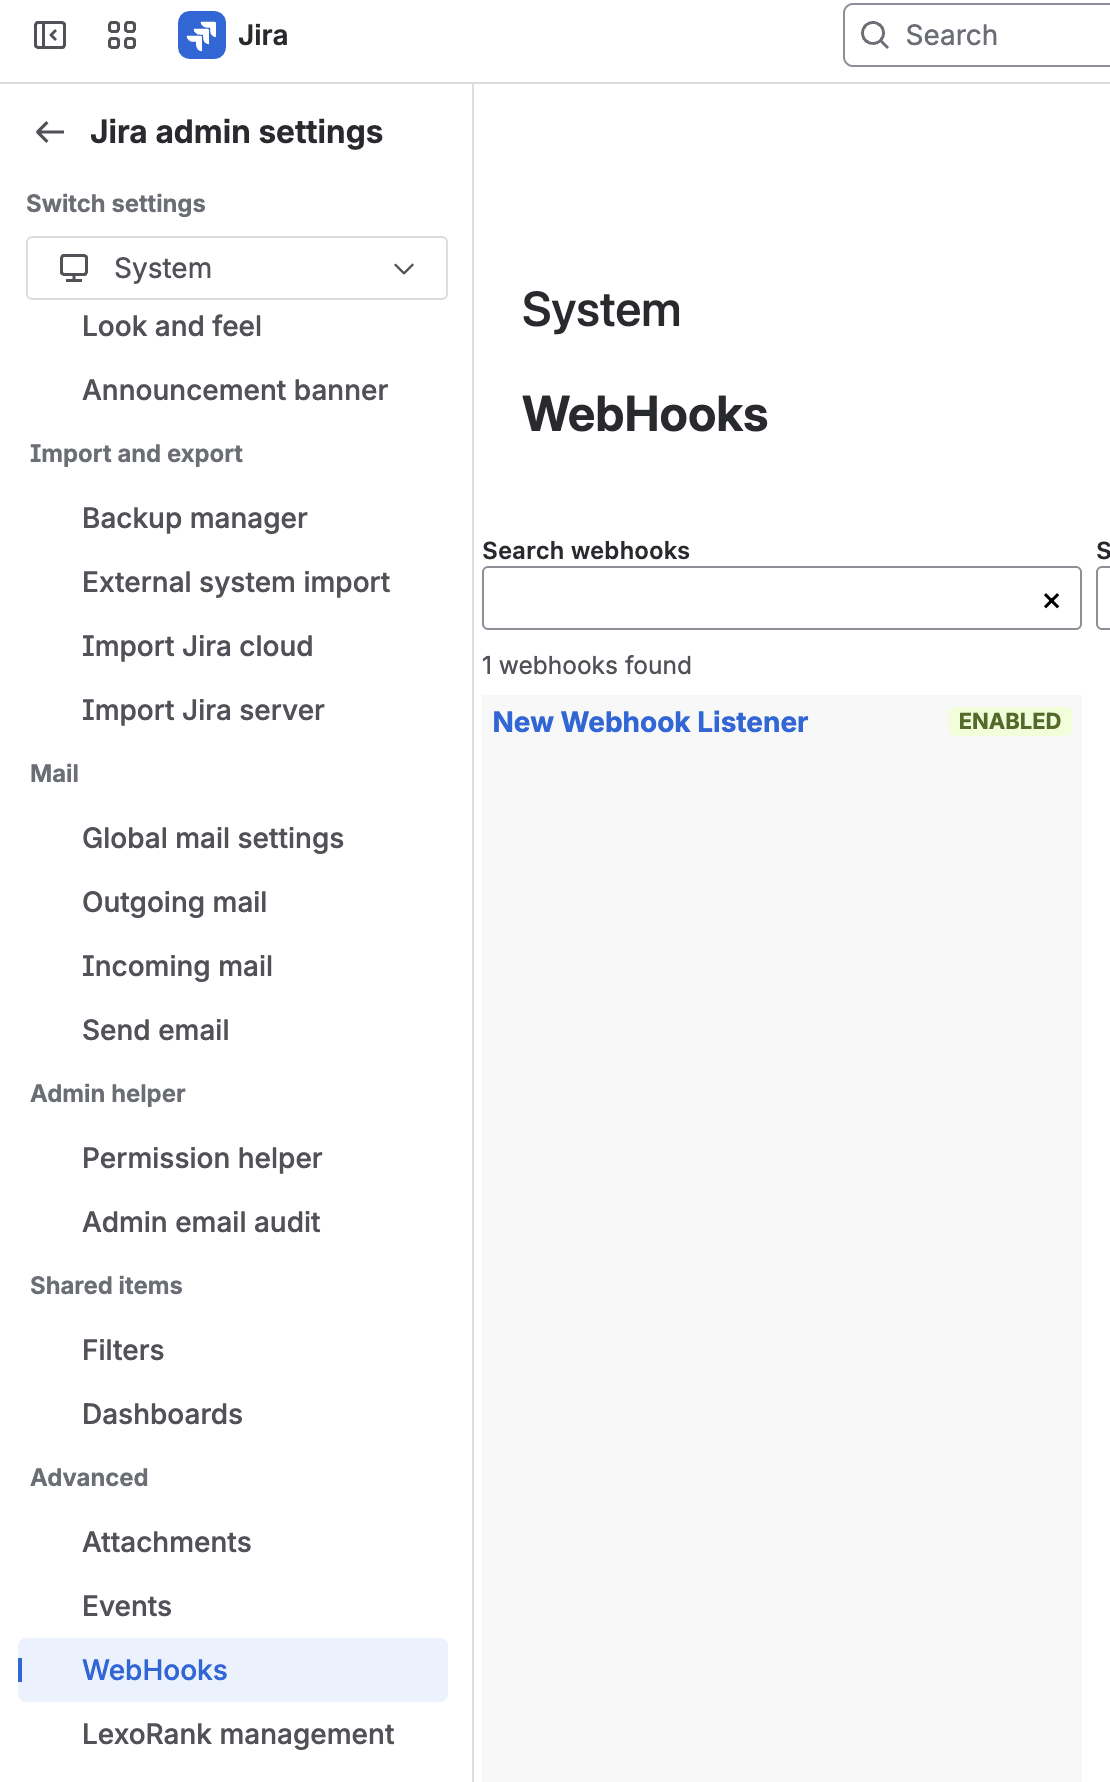
Create a new webhook.

Enter in your FOSSA IP/Port with the path specified below. Note that the webhook URL is different for each Jira site that you configure in FOSSA.
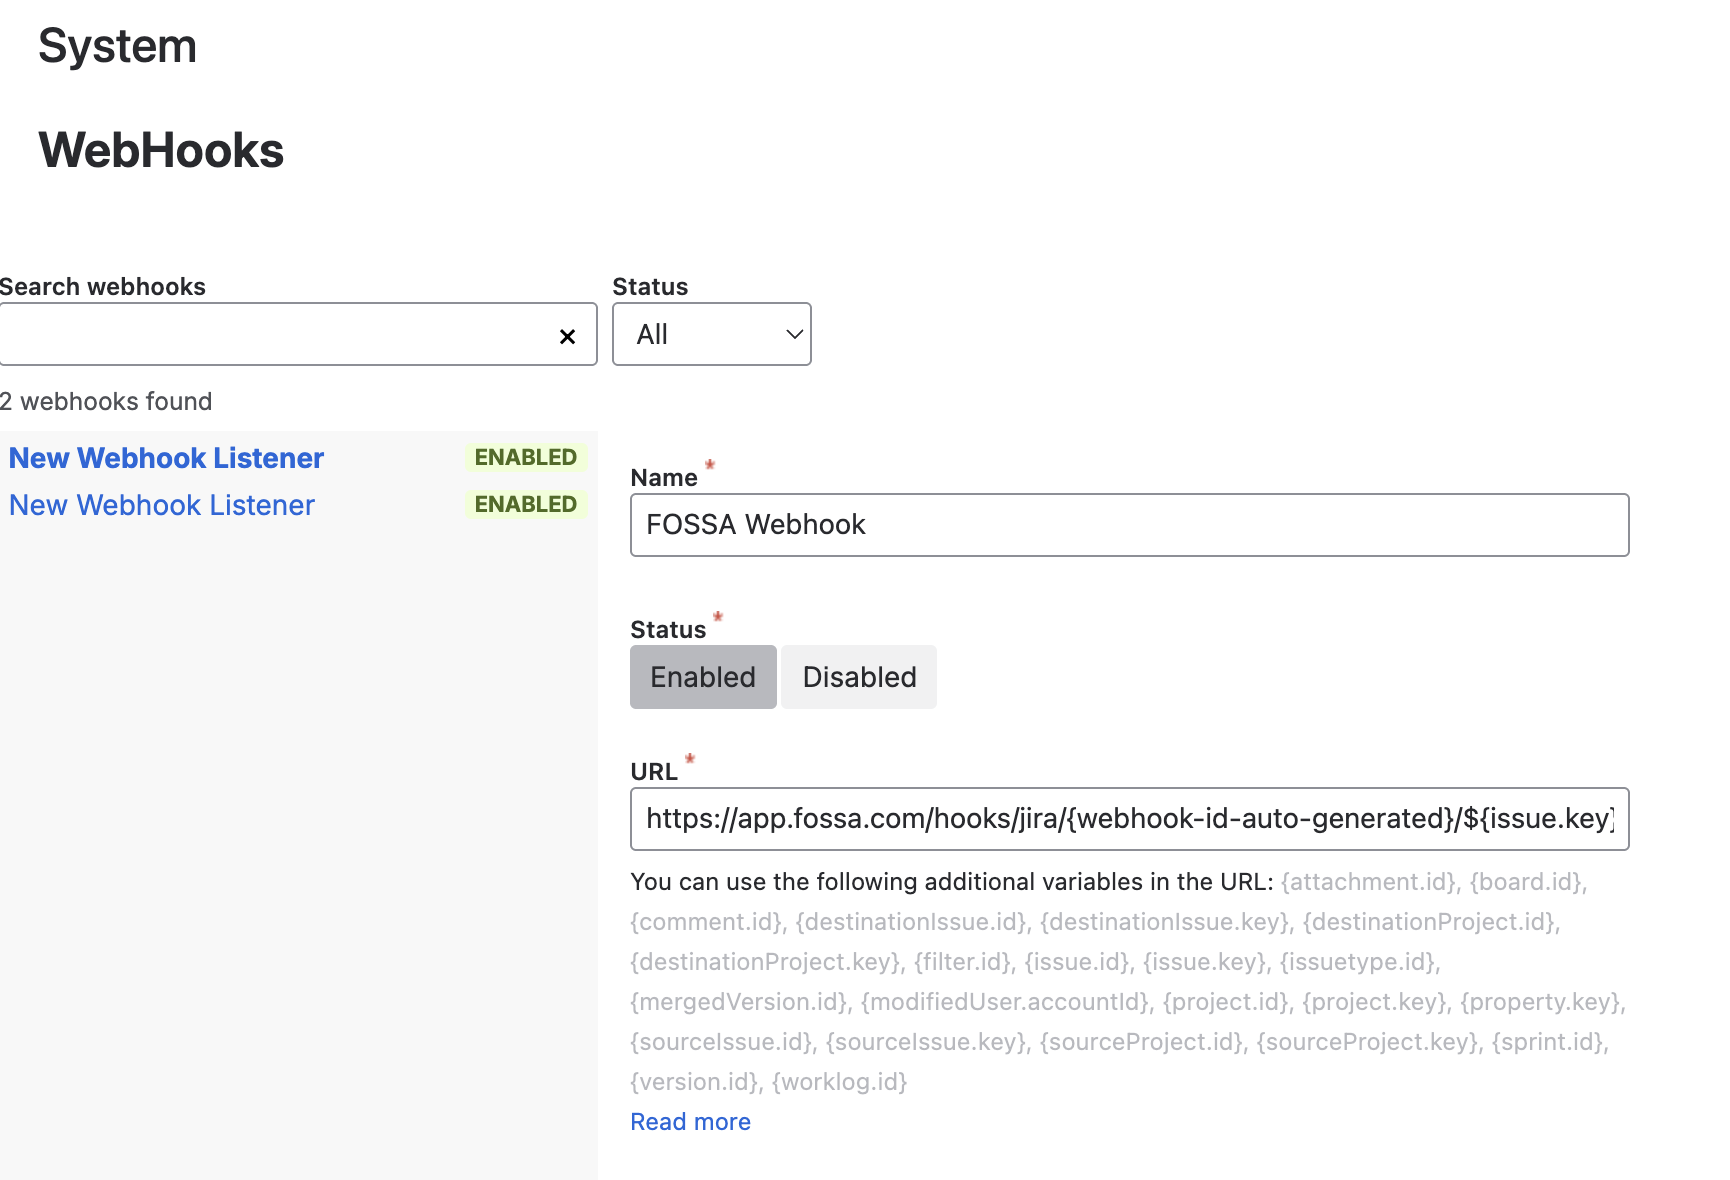
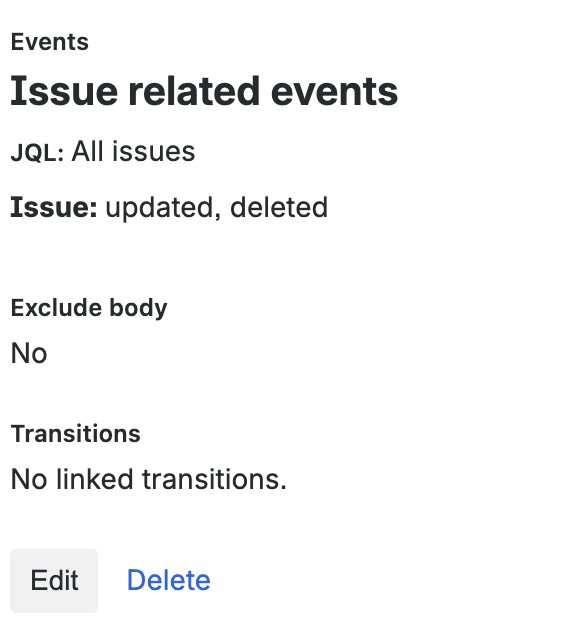
Define events for updating/deleting issues:

After saving changes, you will notice that you have created a new webhook listener and can see the metadata that you entered from previous steps, such as the URL and issue update events. The details of the added webhook looks like the following :
Troubleshooting
Overview
This guide provides systematic troubleshooting steps for FOSSA's Jira integration issues. Based on analysis of support tickets (particularly TKT-13433), most Jira integration failures are not permissions issues but rather field configuration or API compatibility problems.
Common Error Patterns
Generic Error Message
"Failed to create issue. Make sure the configured Jira account has permission to create issues in the target Jira project."Important: This error appears for multiple root causes, not just permissions issues.
Diagnostic Workflow
Step 1: Verify Basic Configuration
-
Check FOSSA Integration Settings
- Site URL format:
https://yourcompany.atlassian.net/ - Project keys exist in Jira
- Username format:
[email protected](not display name) - API token is valid and current
- Site URL format:
-
Verify Jira Permissions
- User has "Create Issues" permission
- User can access the target project
- User can create the specified issue type manually
Step 2: Test Manual API Calls
Before assuming permissions issues, test FOSSA's exact API calls manually:
Single Issue Creation Test
curl -X POST "https://YOUR-JIRA-SITE.atlassian.net/rest/api/2/issue" \
  -H "Content-Type: application/json" \
  -u "[email protected]:YOUR_API_TOKEN" \
  -d '{
    "fields": {
      "project": { "key": "YOUR_PROJECT_KEY" },
      "summary": "Test FOSSA Integration",
      "description": "Testing API compatibility for FOSSA integration",
      "issuetype": { "name": "Bug" },
      "labels": ["FOSSA"]
    }
  }'
Bulk Issue Creation Test
curl -X POST "https://YOUR-JIRA-SITE.atlassian.net/rest/api/2/issue/bulk" \
  -H "Content-Type: application/json" \
  -u "[email protected]:YOUR_API_TOKEN" \
  -d '{
    "issueUpdates": [
      {
        "fields": {
          "project": { "key": "YOUR_PROJECT_KEY" },
          "summary": "Test FOSSA Bulk Integration",
          "description": "Testing bulk API compatibility for FOSSA integration",
          "issuetype": { "name": "Bug" },
          "labels": ["FOSSA"]
        }
      }
    ]
  }'
Troubleshooting Checklist
Basic Configuration
- FOSSA integration enabled and saved
- Jira site URL correct (with trailing slash)
- API token valid and not expired
- Username is email address, not display name
- Project key exists and is accessible
Field Configuration
- Issue type exists in project
- Description field enabled for issue type
- Summary field enabled and required
- No required custom fields blocking creation
Permissions
- User can manually create issues in target project
- User has "Create Issues" permission
- User can access the project
- API token has appropriate scopes
API Testing
- Manual API calls succeed with same credentials
- Bulk API calls work
- Error responses provide specific field information
Advanced Debugging
Enable Jira API Logging
- Go to Jira Administration → System → Logging and profiling
- Add package:
com.atlassian.jira.rest - Set level to DEBUG
- Reproduce the issue
- Check logs for specific API call details
Network Connectivity
# Test connectivity to Jira
curl -I "https://yourcompany.atlassian.net/"

# Test API endpoint accessibility
curl -u "email:token" "https://yourcompany.atlassian.net/rest/api/2/myself"
FOSSA Debug Information
- Check FOSSA logs for integration attempts
- Look for specific error codes or API responses
- Verify integration configuration in FOSSA database
| Error Pattern | Root Cause | Solution |
|---|---|---|
| Generic permission error + manual API works | Field configuration | Enable required fields for issue type |
| Permission error + manual API fails | Actual permissions | Grant "Create Issues" permission |
| Issue type error | Missing issue type | Add issue type to project scheme |
| Custom field error | Required custom fields | Make fields optional or use different issue type |
| Connectivity error | Network/URL issues | Verify Jira URL and network access |
Support Escalation
Escalate to engineering when:
- Manual API calls work but FOSSA integration fails
- Field configurations are correct but integration still fails
- API responses suggest FOSSA is sending malformed requests
- Multiple customers report the same integration pattern failure
Include in escalation:
- Complete API test results (both success and failure cases)
- Jira project configuration details
- FOSSA integration settings
- Specific error messages from API responses (not just FOSSA UI messages)
When FOSSA generates a ticket, by default it sets the Jira issueType to be Task. This is one of the default issue types for new Jira installations, but your admin may have deleted/configured out this issue type or your installation could just be missing it. Check on the existing issue types in Jira and create the Task type if it is missing.
See the Jira help doc for more instructions.
Updated 4 months ago
