Okta
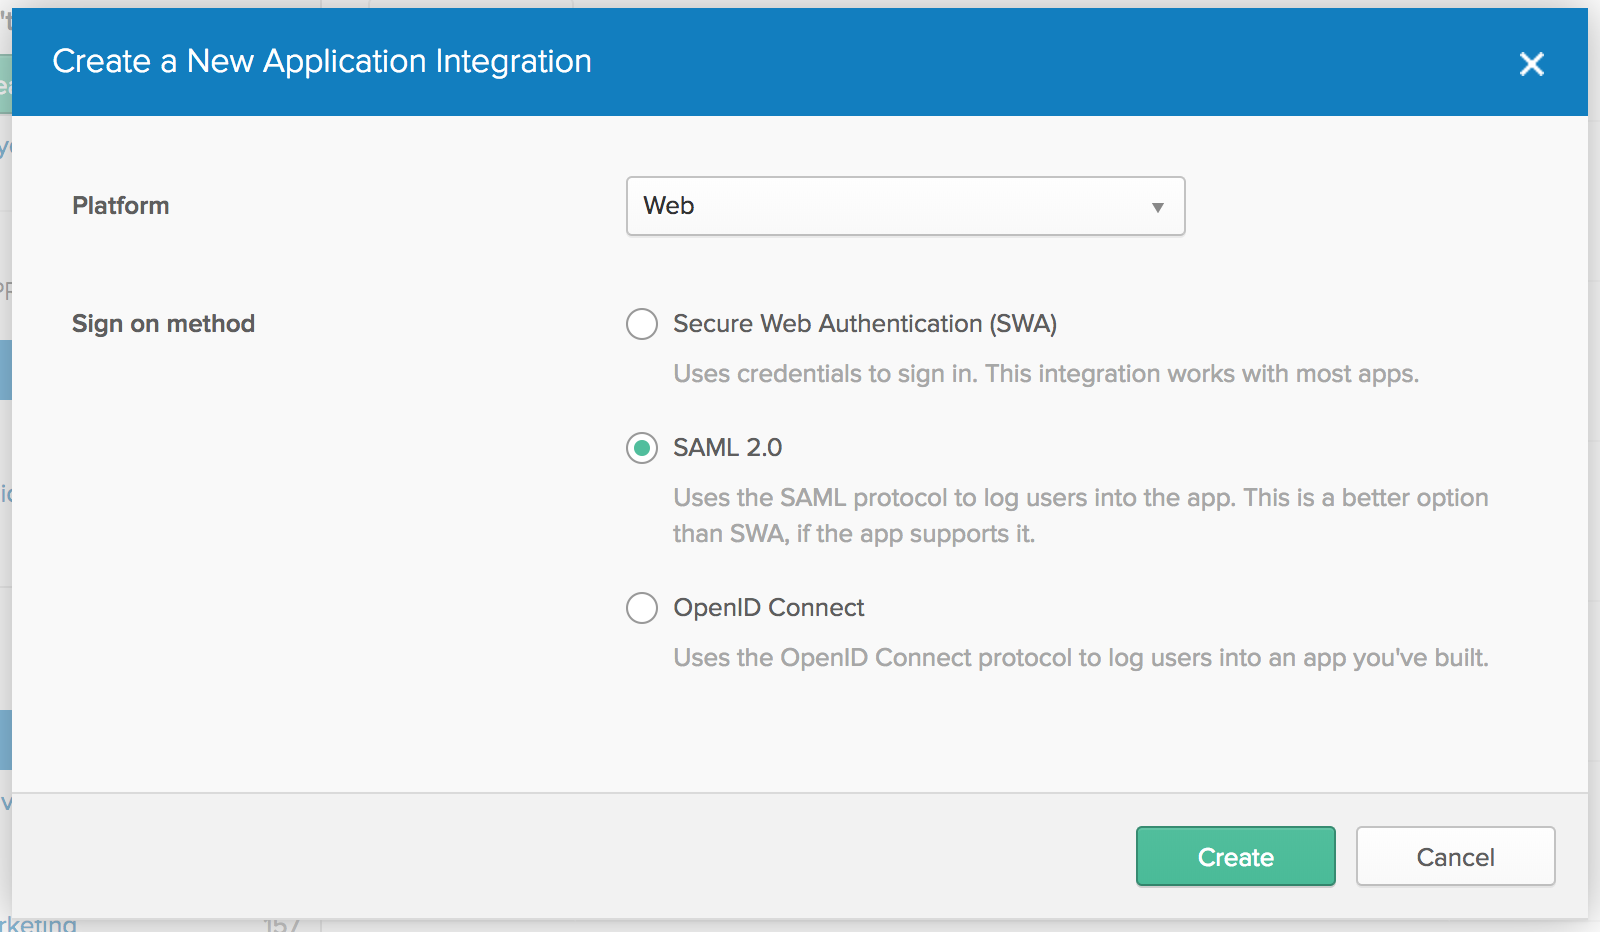
To configure Okta for single sign on with FOSSA, log in to your Okta admin panel and navigate to Applications → Add Application → Create New App. Choose "Web" as the platform, and "SAML 2.0" as the sign on method.
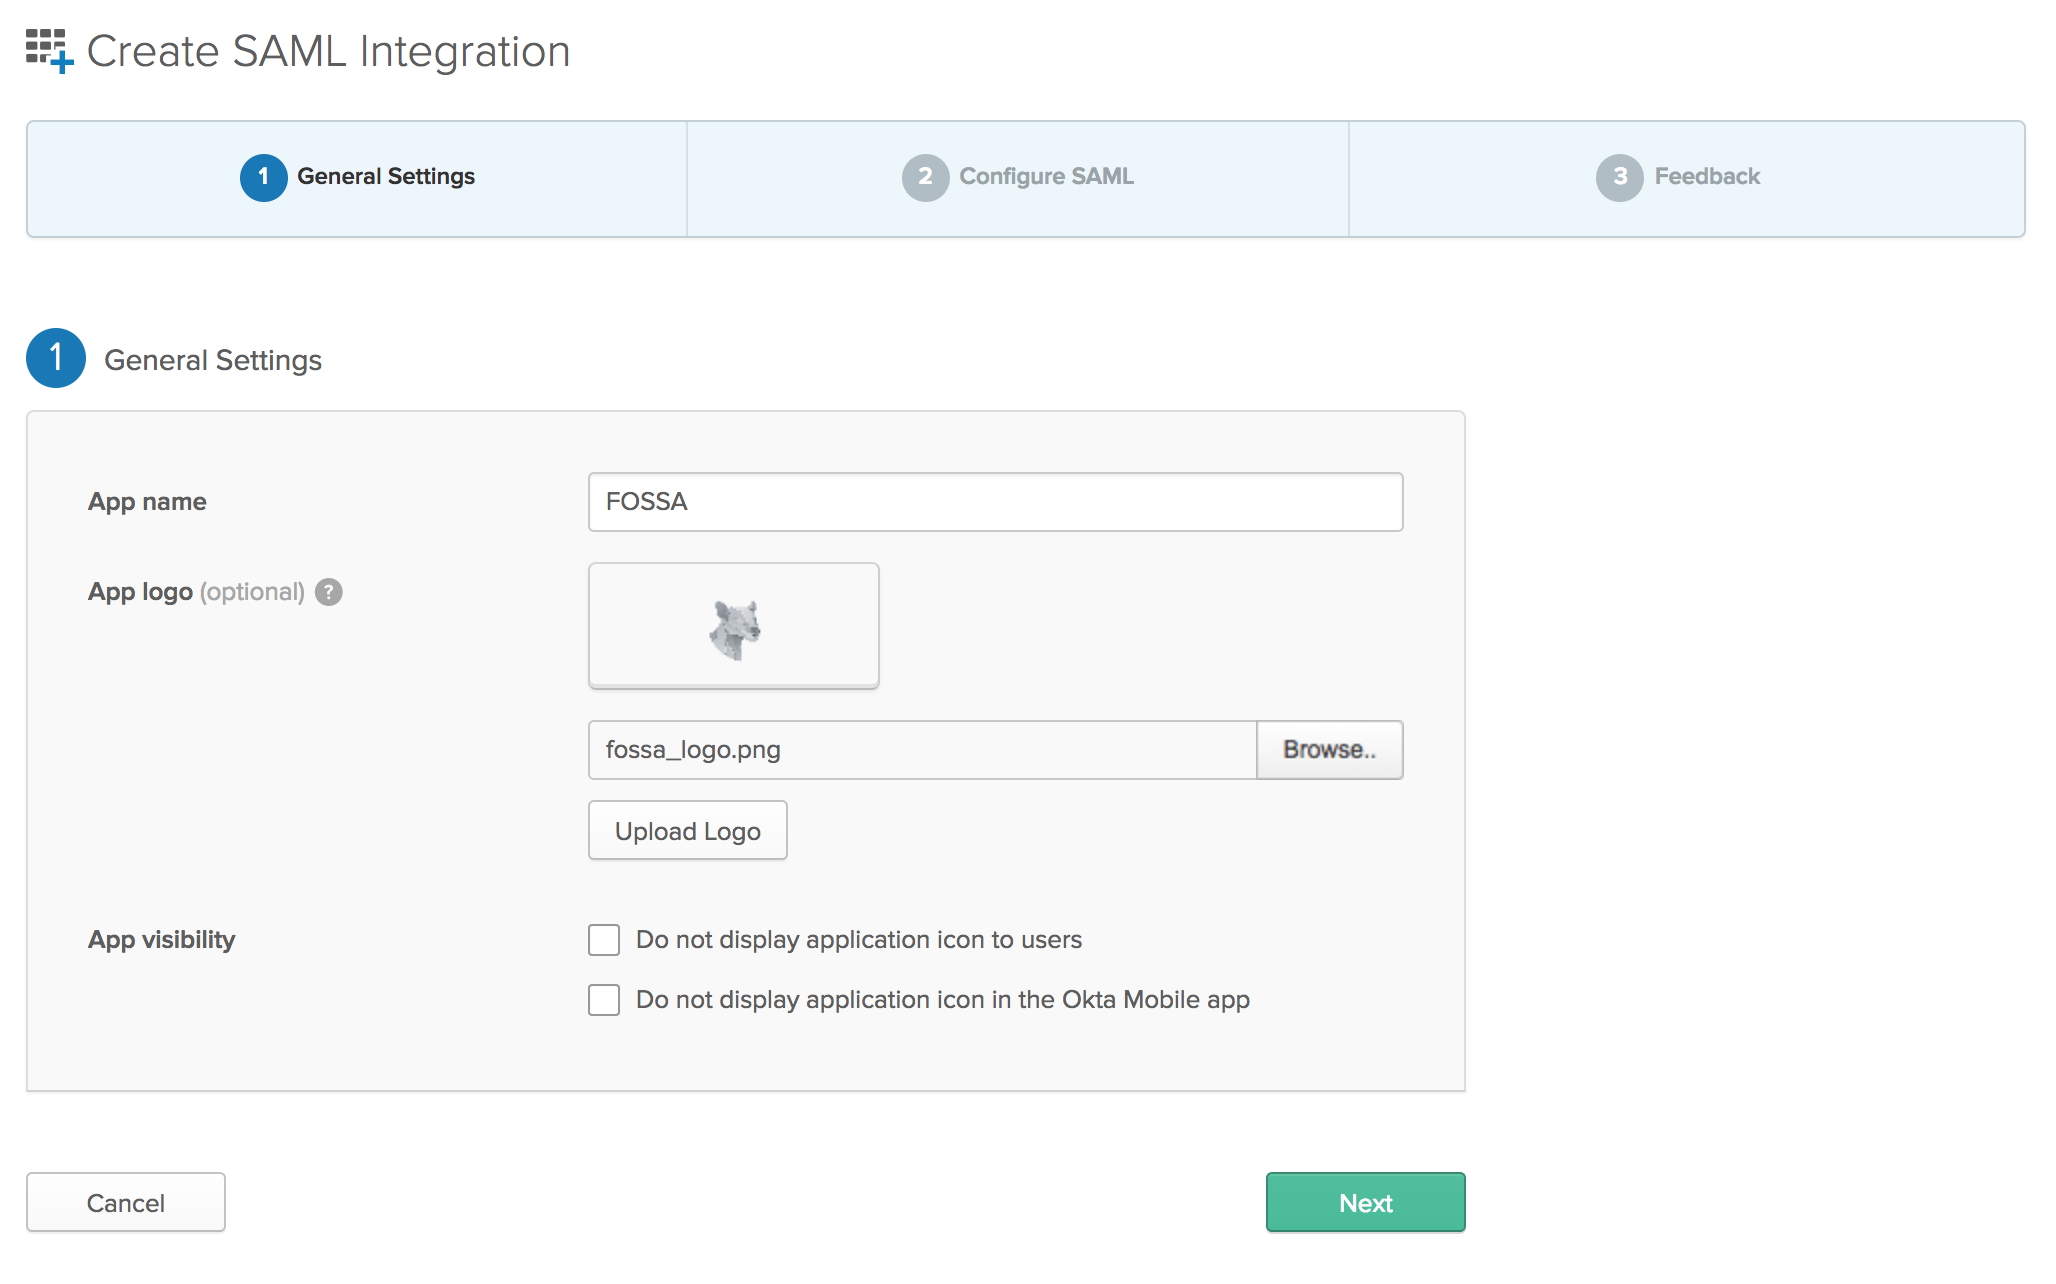
On the next page, you can name the app "FOSSA" and upload our logo, which you can download here.
To configure the SAML settings on Okta, you'll need some information from the SAML settings page on FOSSA.
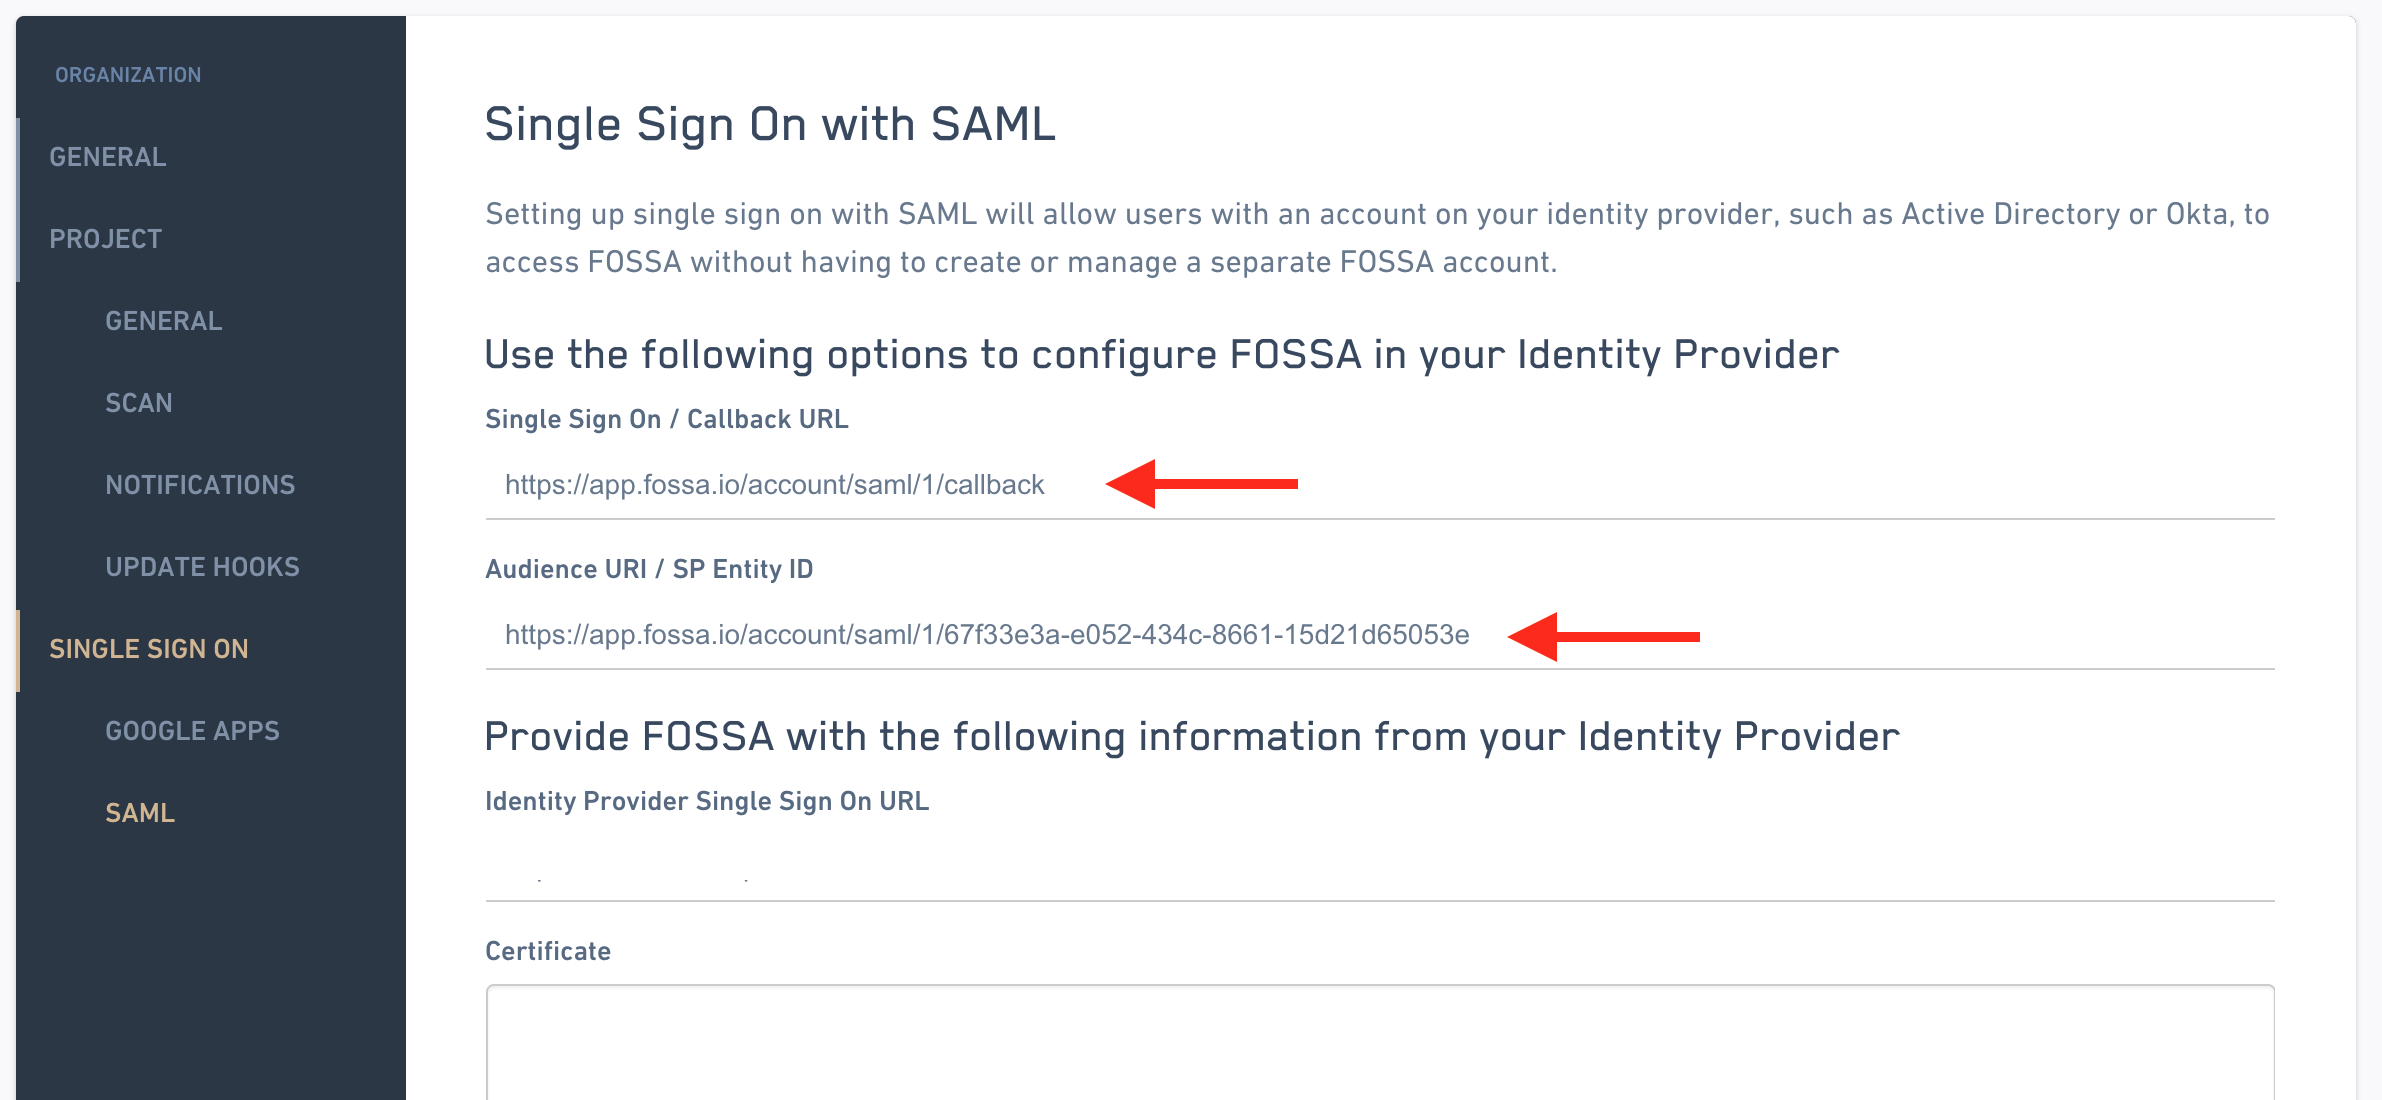
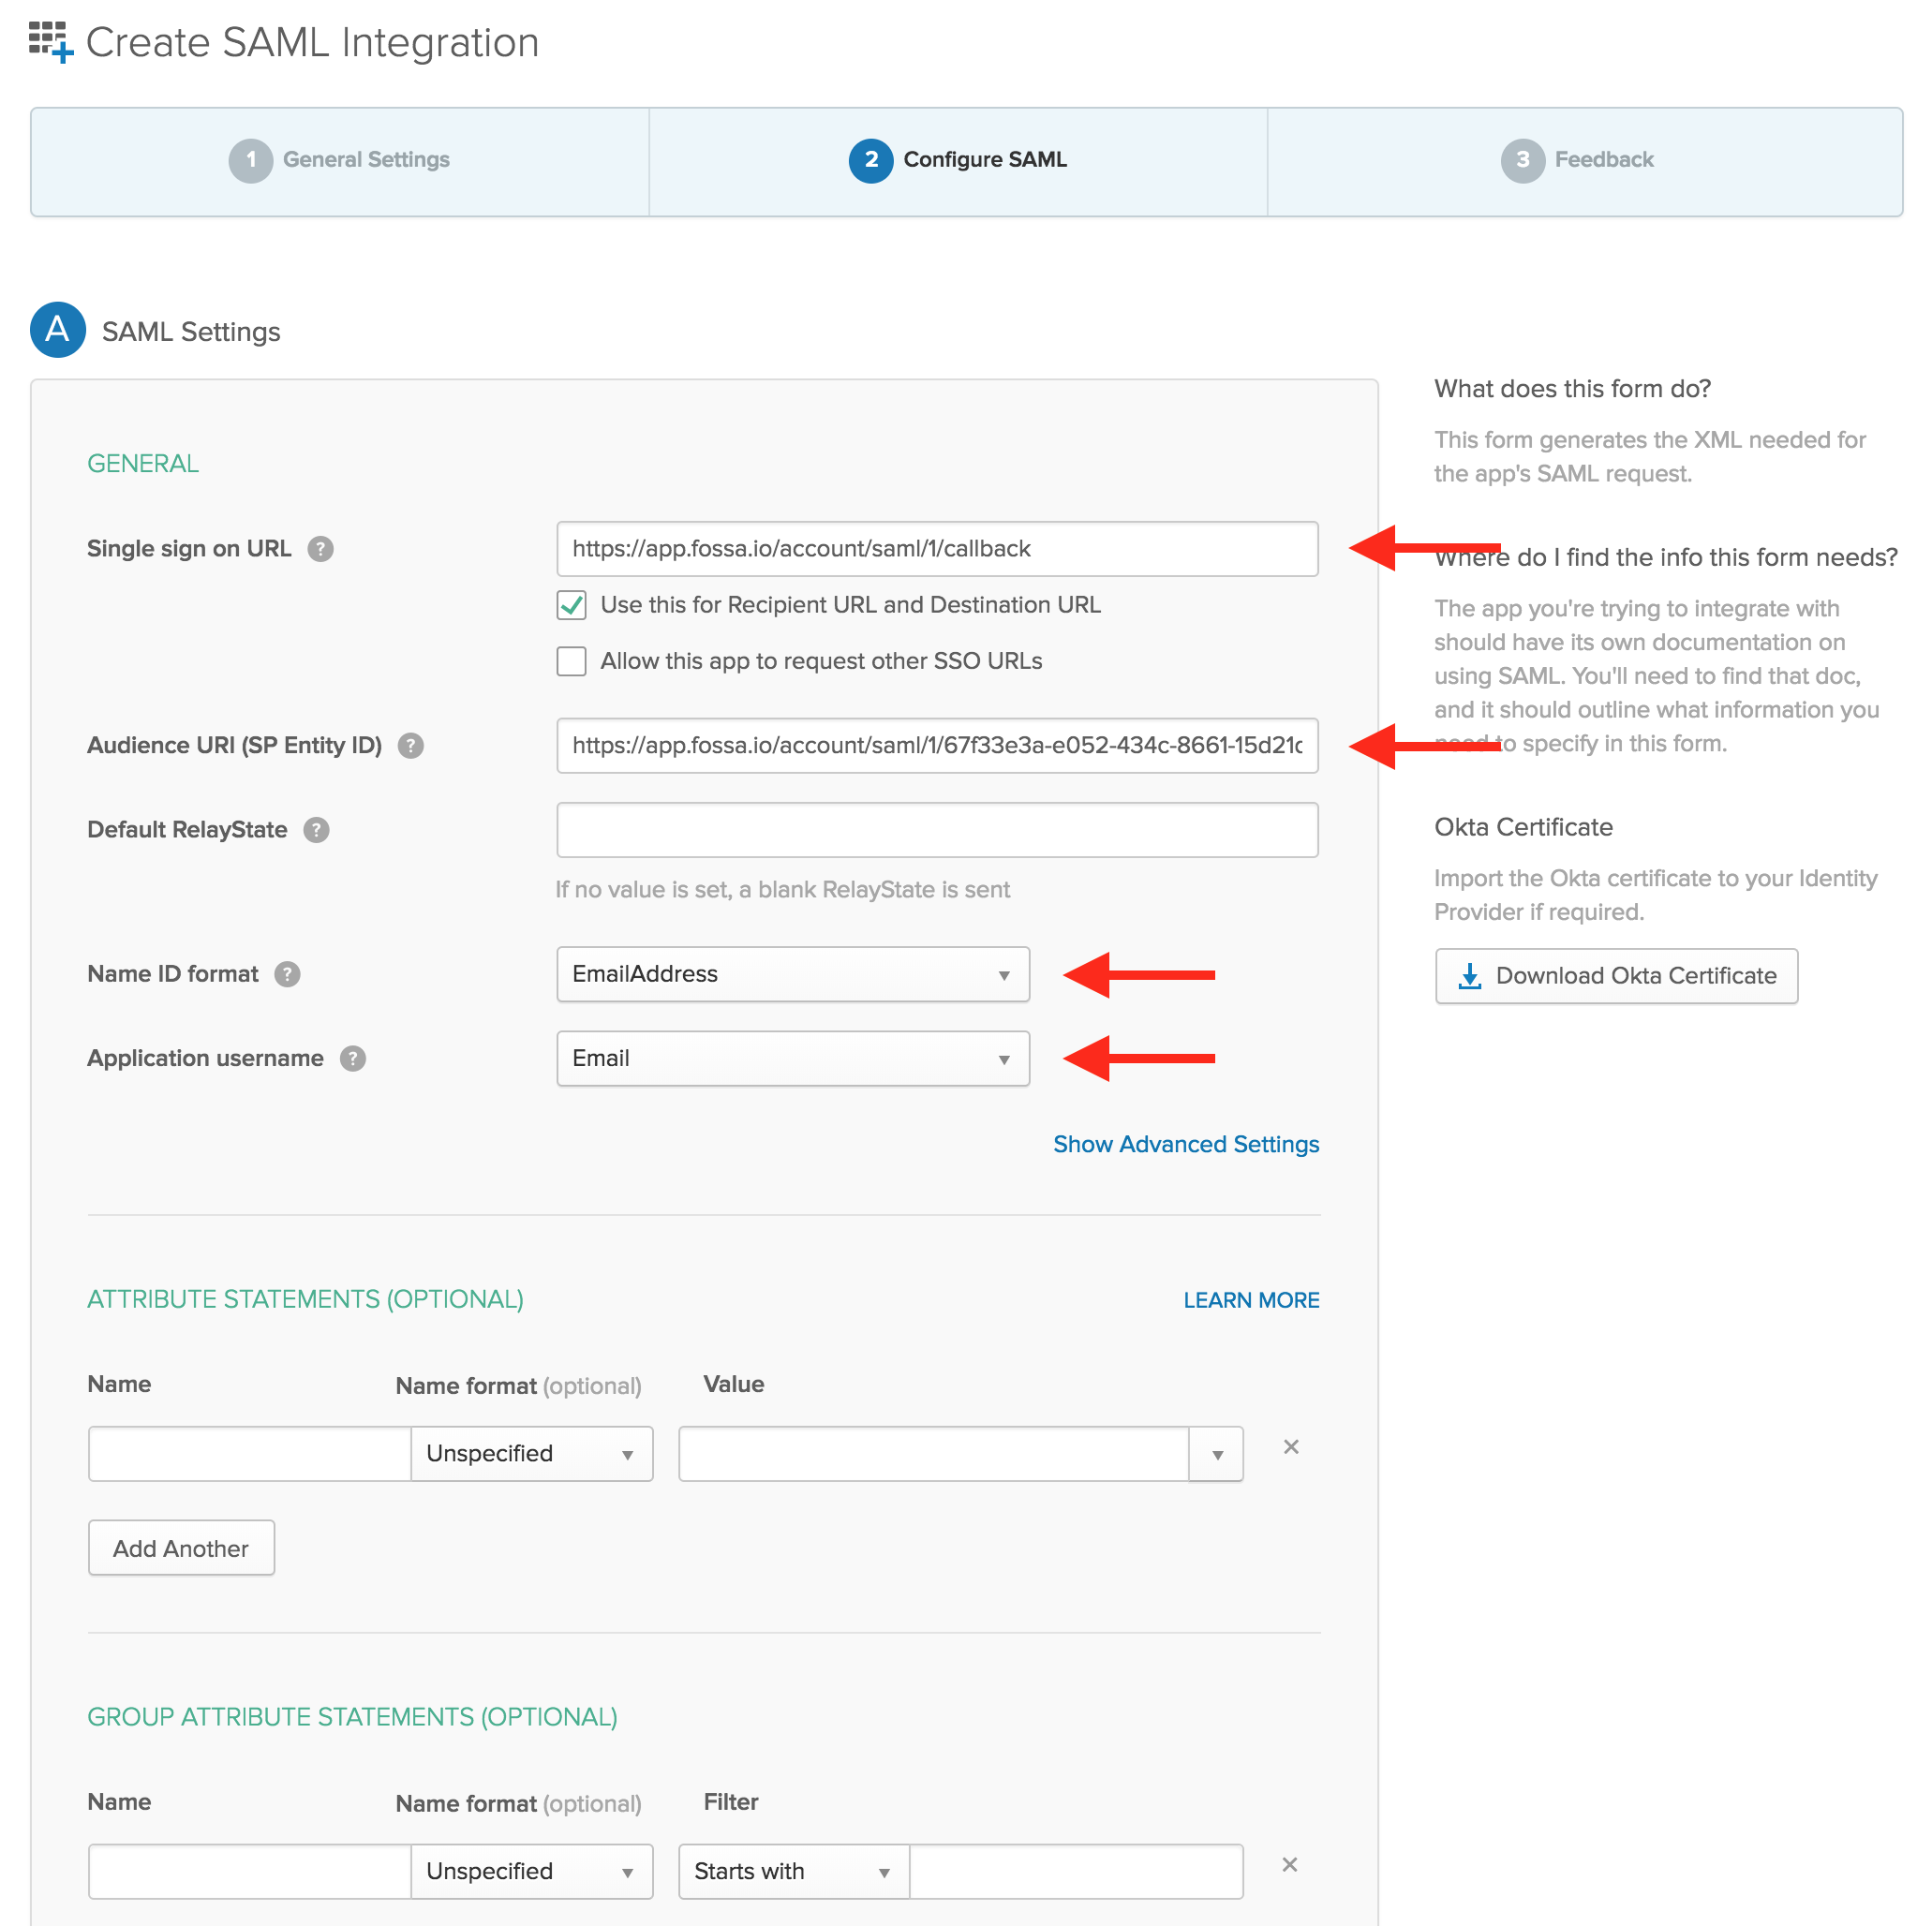
On Okta, fill out the "Single sign on URL" and "Audience URI" with the information provided by FOSSA. Then set the "Name ID format" field to "EmailAddress" and the "Application username" field to "Email".
Role and Team Assignment
You are able to auto assign Role and Team permission to the user as part of the SAML attribute response. Please refer to the Teams (RBAC) Guide for further details.
You can then click next and finish creating the app then Okta will redirect you to the application settings page. To finish setting up Okta on FOSSA, click "View Setup Instructions". This will open a new page which has two pieces of information that you'll need to copy into the FOSSA settings page: (1) the Identity Provider Single Sign-On URL and (2) the X.509 Certificate.
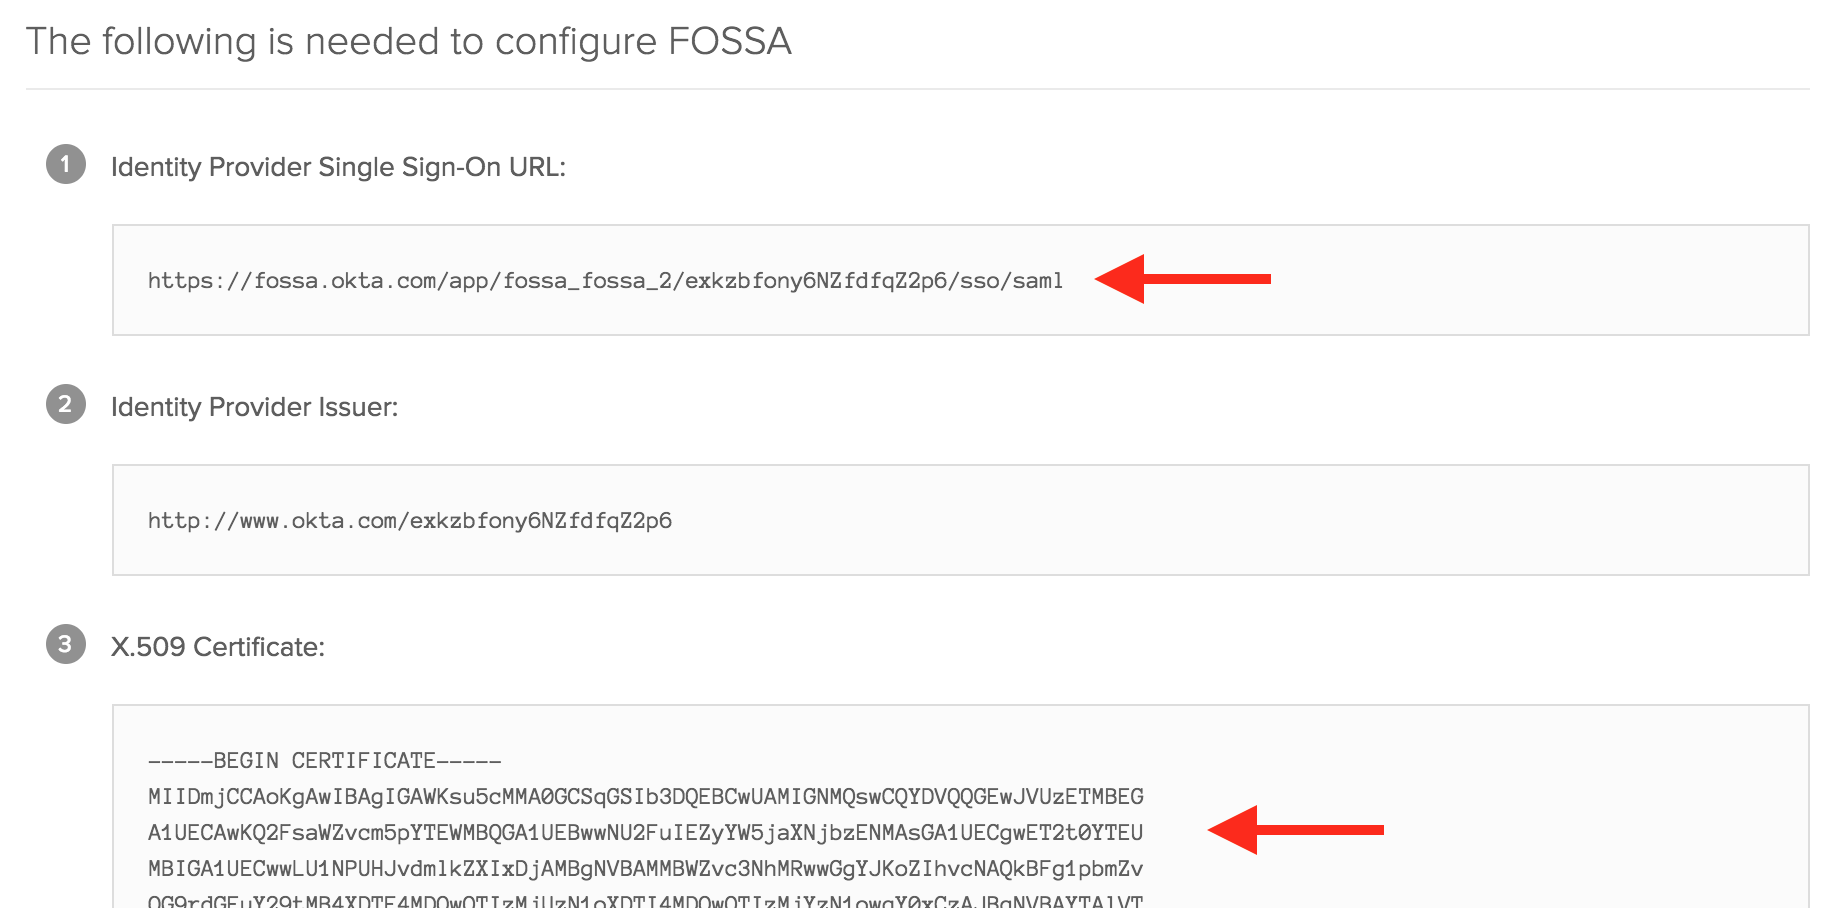
Copy those values into the FOSSA settings page then click "Save Changes" in the top right corner.
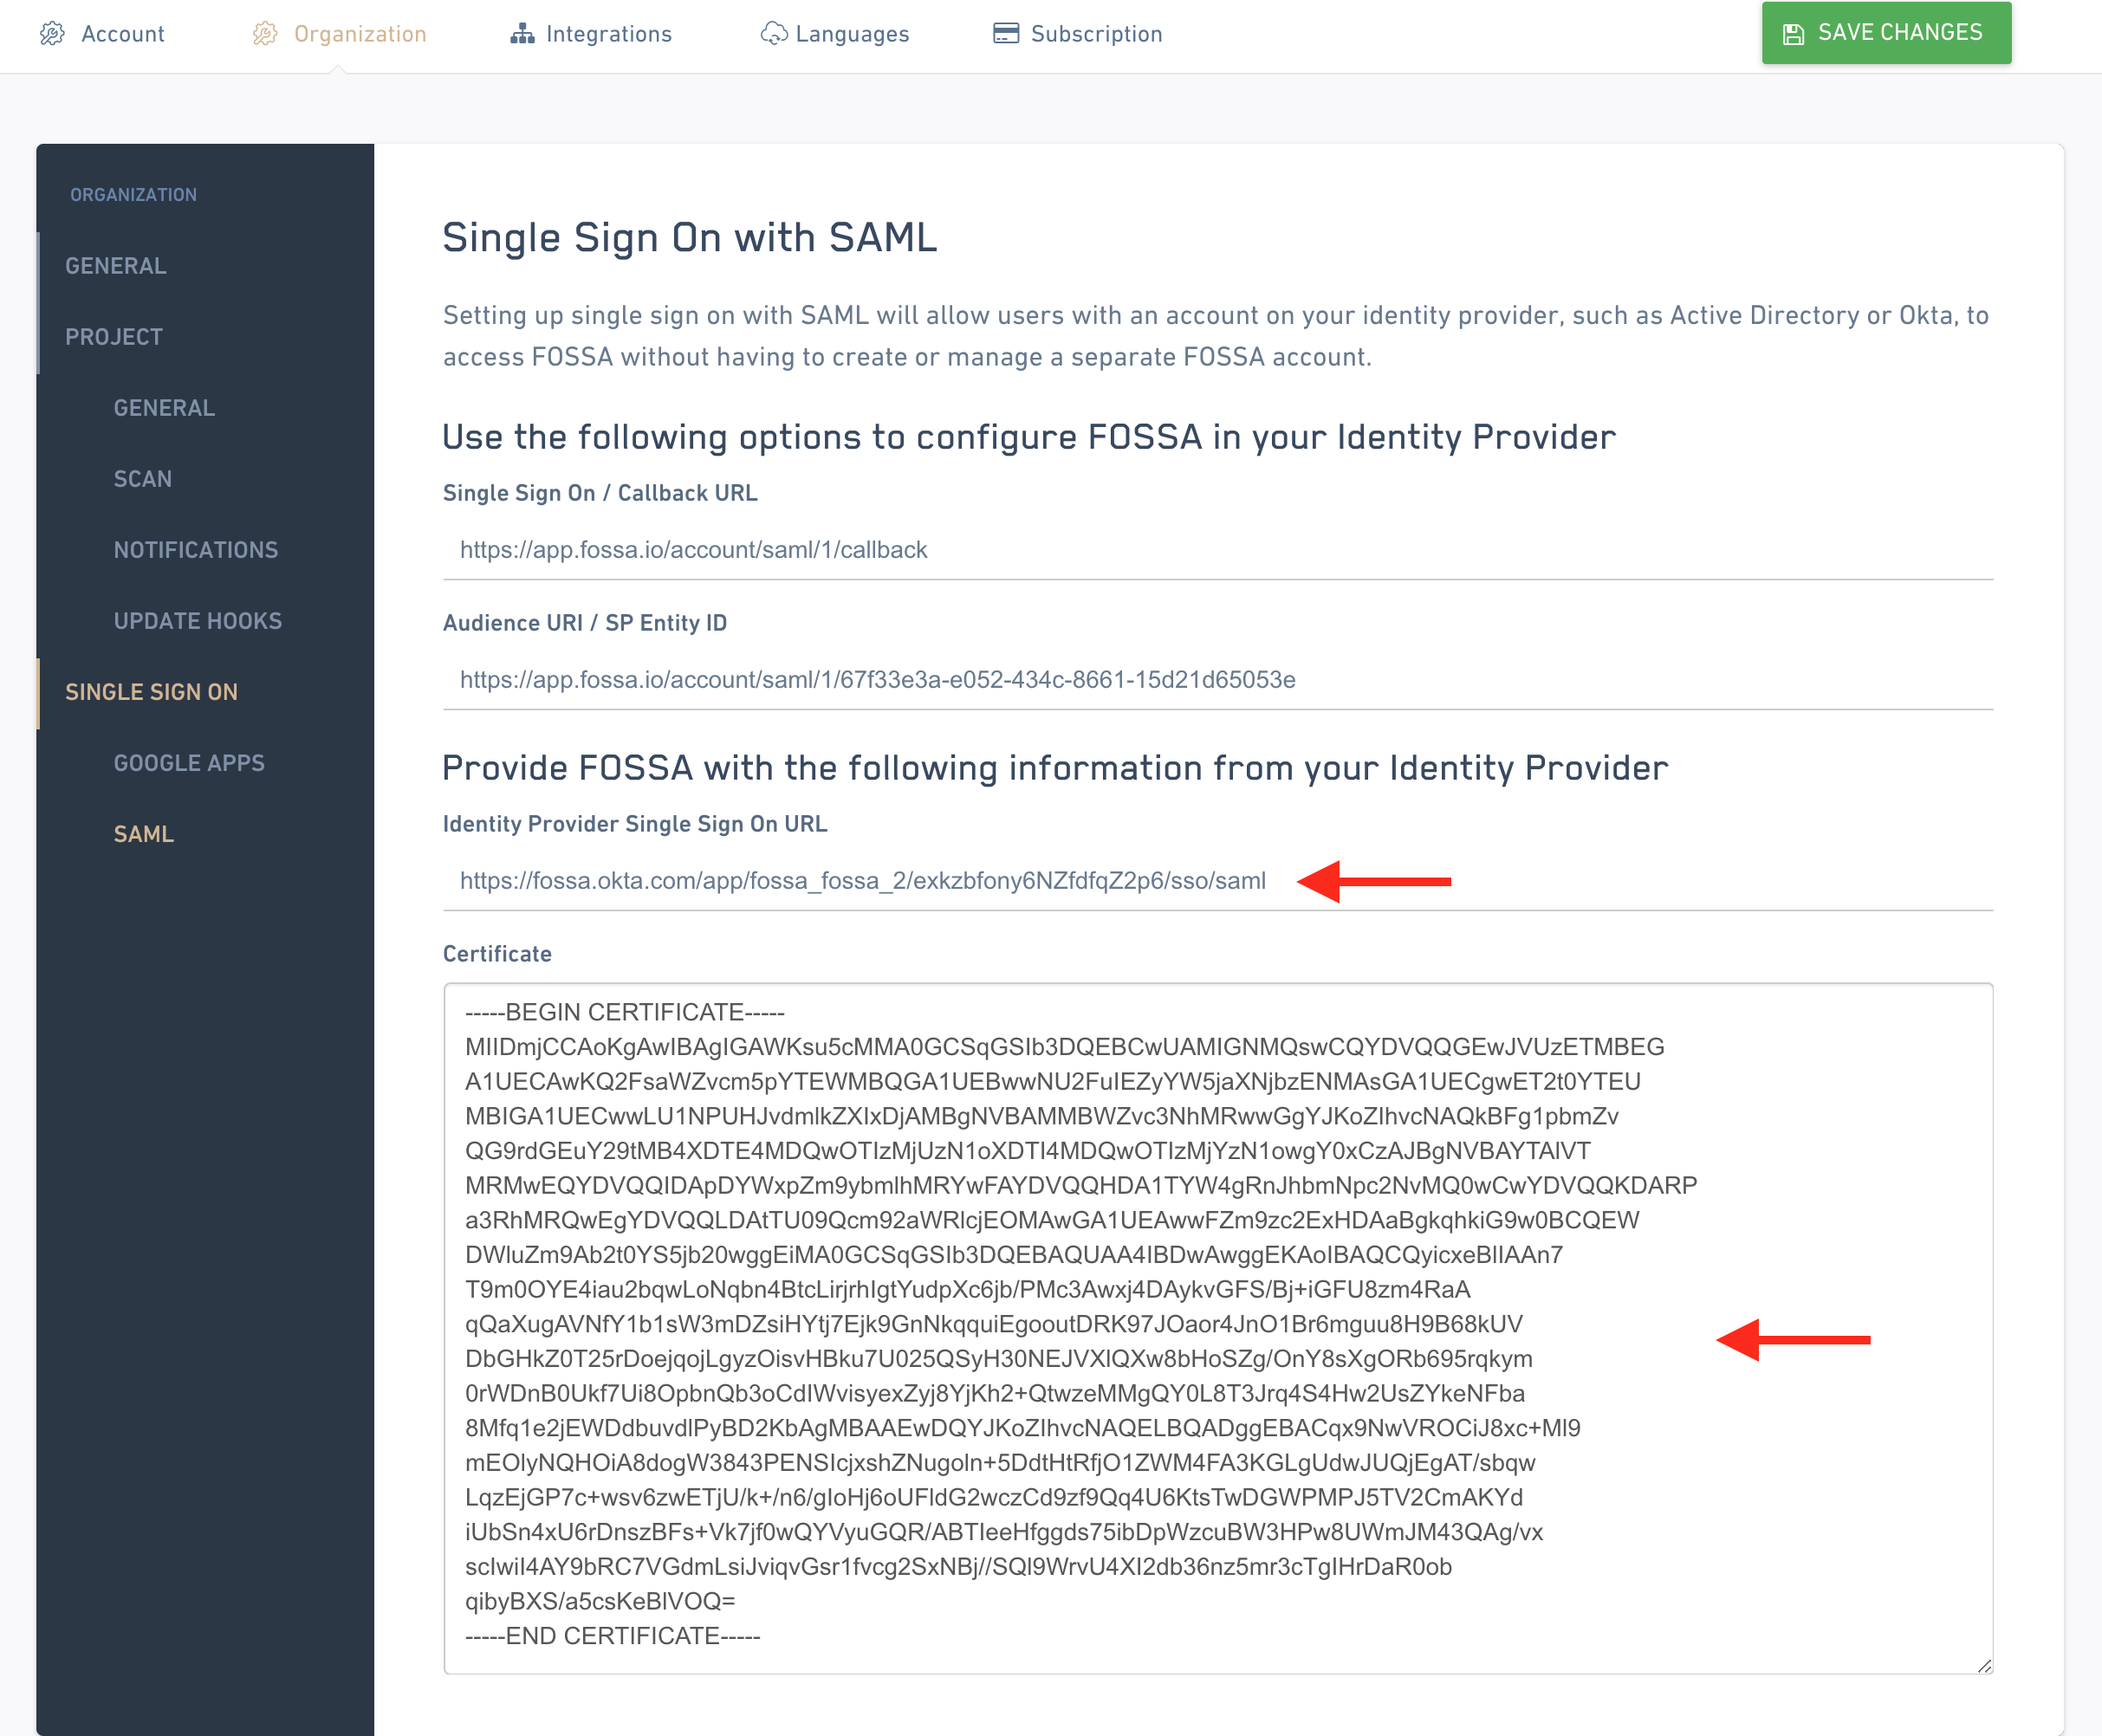
Congratulations, you're good to go! For their first log in, your users will have to click the FOSSA icon on their Okta dashboard which will redirect them to FOSSA and create their account. Afterwards, they can continue to log in directly from Okta, or by entering their email address on the FOSSA login page.
Updated 5 months ago
