Unknown and Failed Dependencies
In the Dependencies tab of a project or release group, you can filter for Unknown or Failed Dependencies. These occur when FOSSA is unable to retrieve or build a dependency from the known source(s) of truth for the relevant package manager. You can manually resolve the issue by providing an archive for FOSSA to scan.
This can be done one of two ways, depending on your needs:
1. Overwriting an Unknown Dependency
2. Adding a New Dependency
Overwriting an Unknown Dependency
If your project's analysis has finished, and you have dependencies labeled "Unknown" with an error message, that means FOSSA was unable to resolve, or locate, the named dependency.
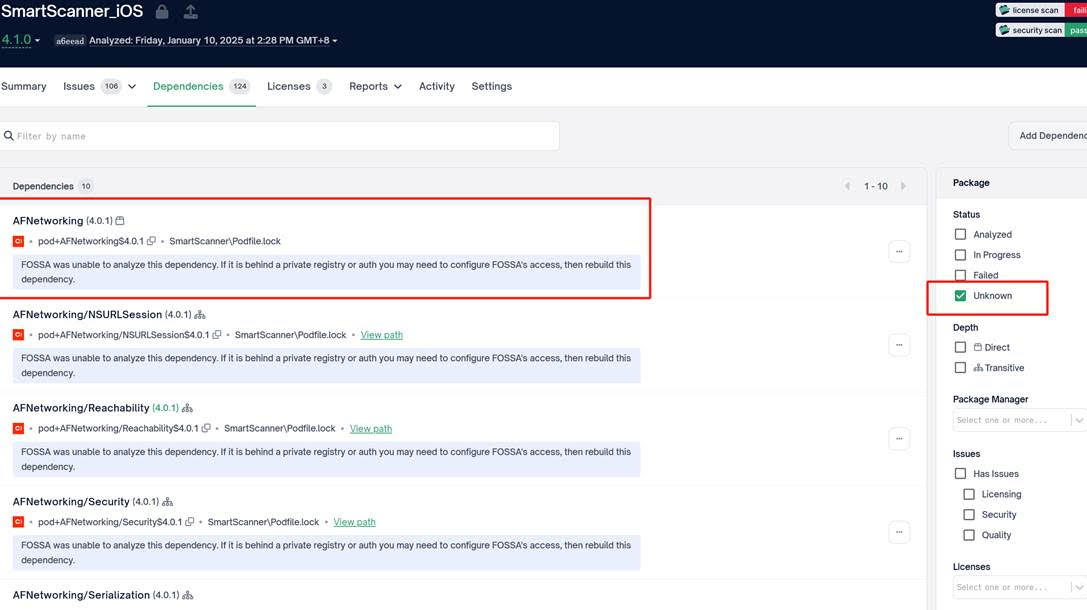
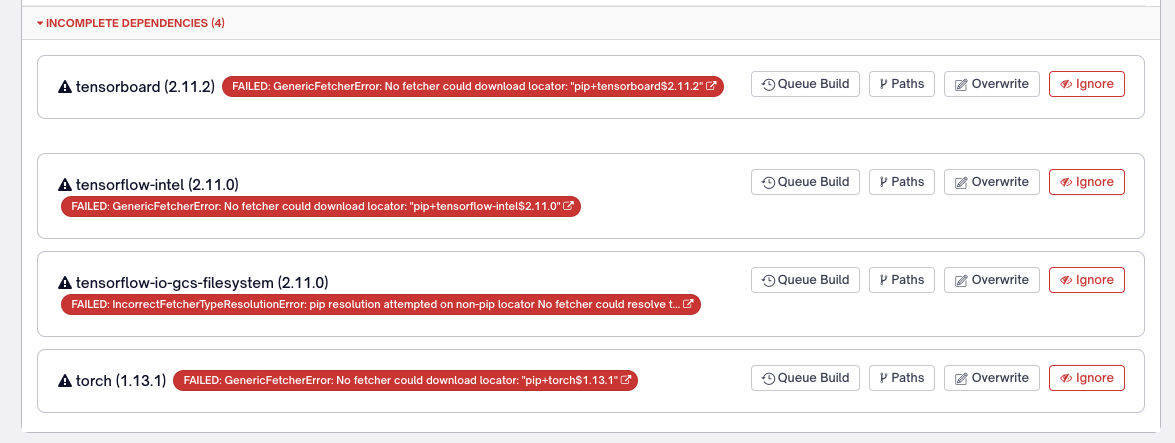
This can be manually corrected by clicking the "Overwrite" button on the right-hand side of the screen and filling in the appropriate data.
You can do so, by following these steps:
- Navigate to the dependency's homepage, and find an archive of the source files for your matching version.
- In this example, we'll use the first unknown dependency from our list, "
tensorboard"Tips- Using the URL is the preferred method here - it tends to be faster and will allow the unknown dependency to become resolved for this project.
- You can typically find a compressed version of the source from the "Releases" or "Tags" on a project's GitHub Page.
- When using a PyPI dependency, you can also use the URL to the
.whlfile if no source is available.
- In this example, we'll use the first unknown dependency from our list, "
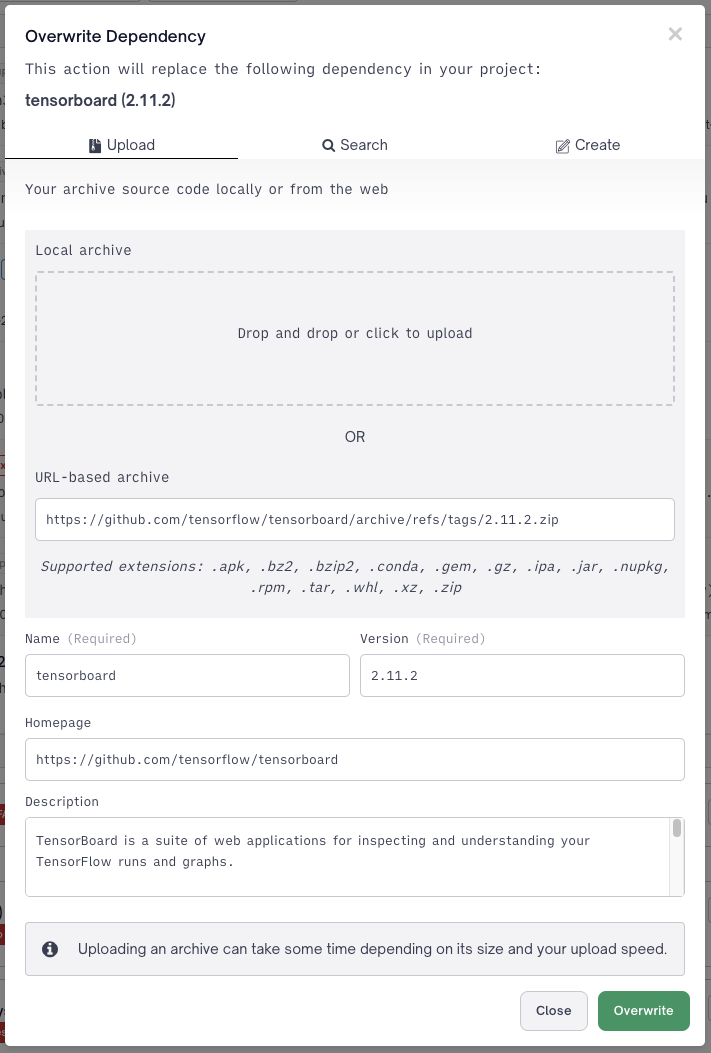
Above, you can see that I've found tensorboard's homepage on GitHub, and located the .zip for my version - 2.11.2
- Be sure to copy the description and homepage for the dependency. You'll be able to view this metadata in the FOSSA web app, and it may prove useful in the future.
- Once you've finished your data entry, select "Overwrite" and the modal will close.
- At this point, your page should refresh and your build should be queued:
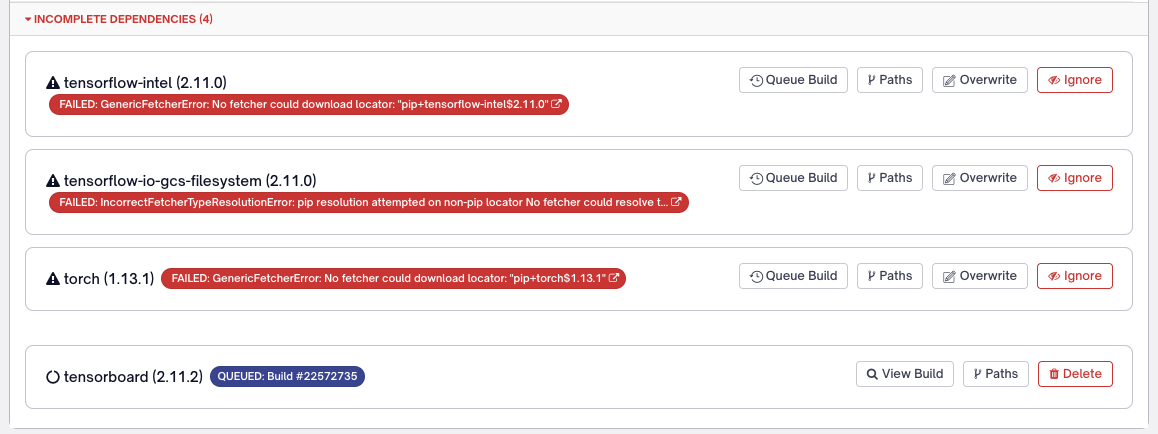
- In a moment, your dependency will begin analysis:
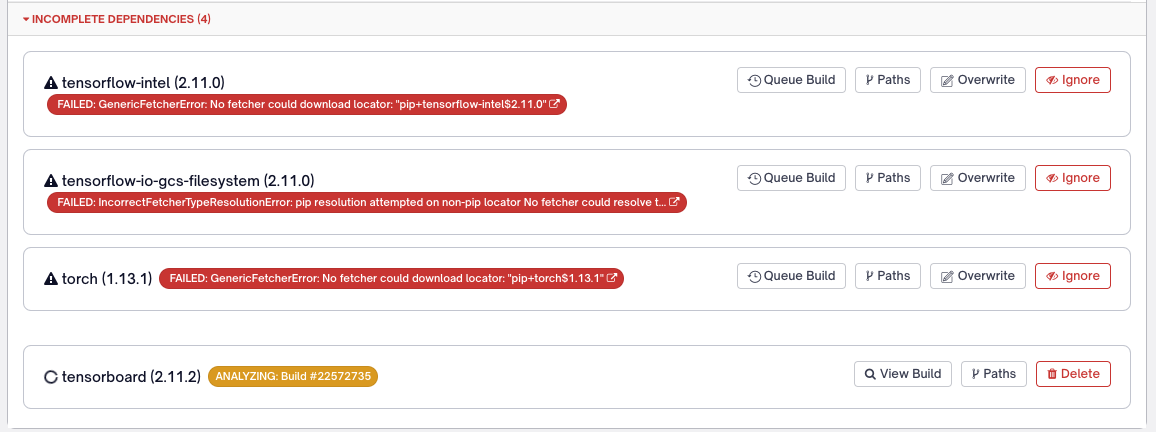
Tip: If you'd like to view the progress of your analysis, you can select "View Build" and then "View" in the LOGS column.
- Once the Analysis has finished, your overwritten dependency should have been moved to the top of the dependencies list, and is denoted by a blue "Manual Dependency" tag.
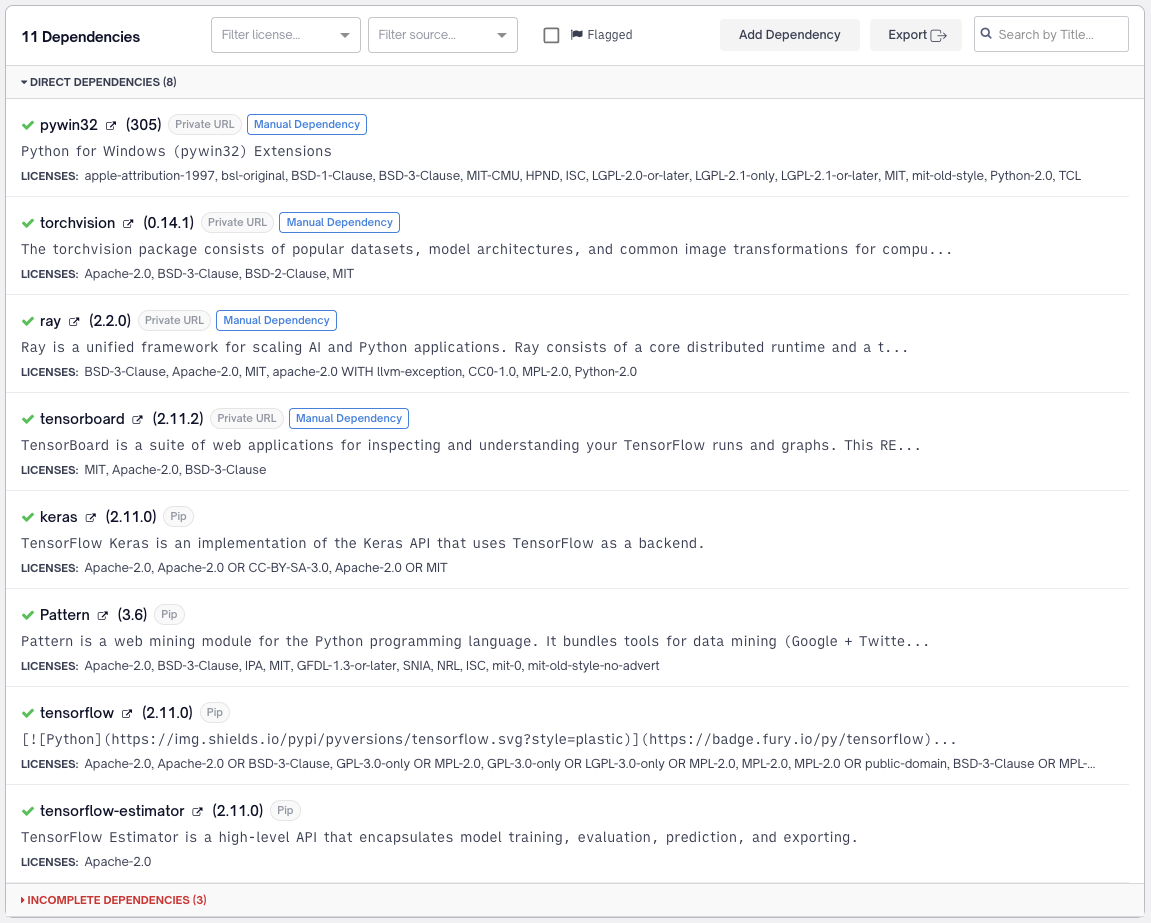
As you can see above, I've added a handful of dependencies for this example, and have fewer unknown (incomplete) dependencies after overwriting tensorboard.
Adding a New Dependency
The process for adding a new dependency is very similar to overwriting one, but there are slight differences in the UI and how it affects your project.
- To add a new dependency, start by selecting the "Add Dependency" button available at the top of the "Dependencies" tab:

- After clicking "Add a Dependency" a modal should appear. You can either Upload an Archive directly, search for a package across the web, create a dependency from scratch, or point to a URL that contains an archive. - In this case, I'll be using the URL.
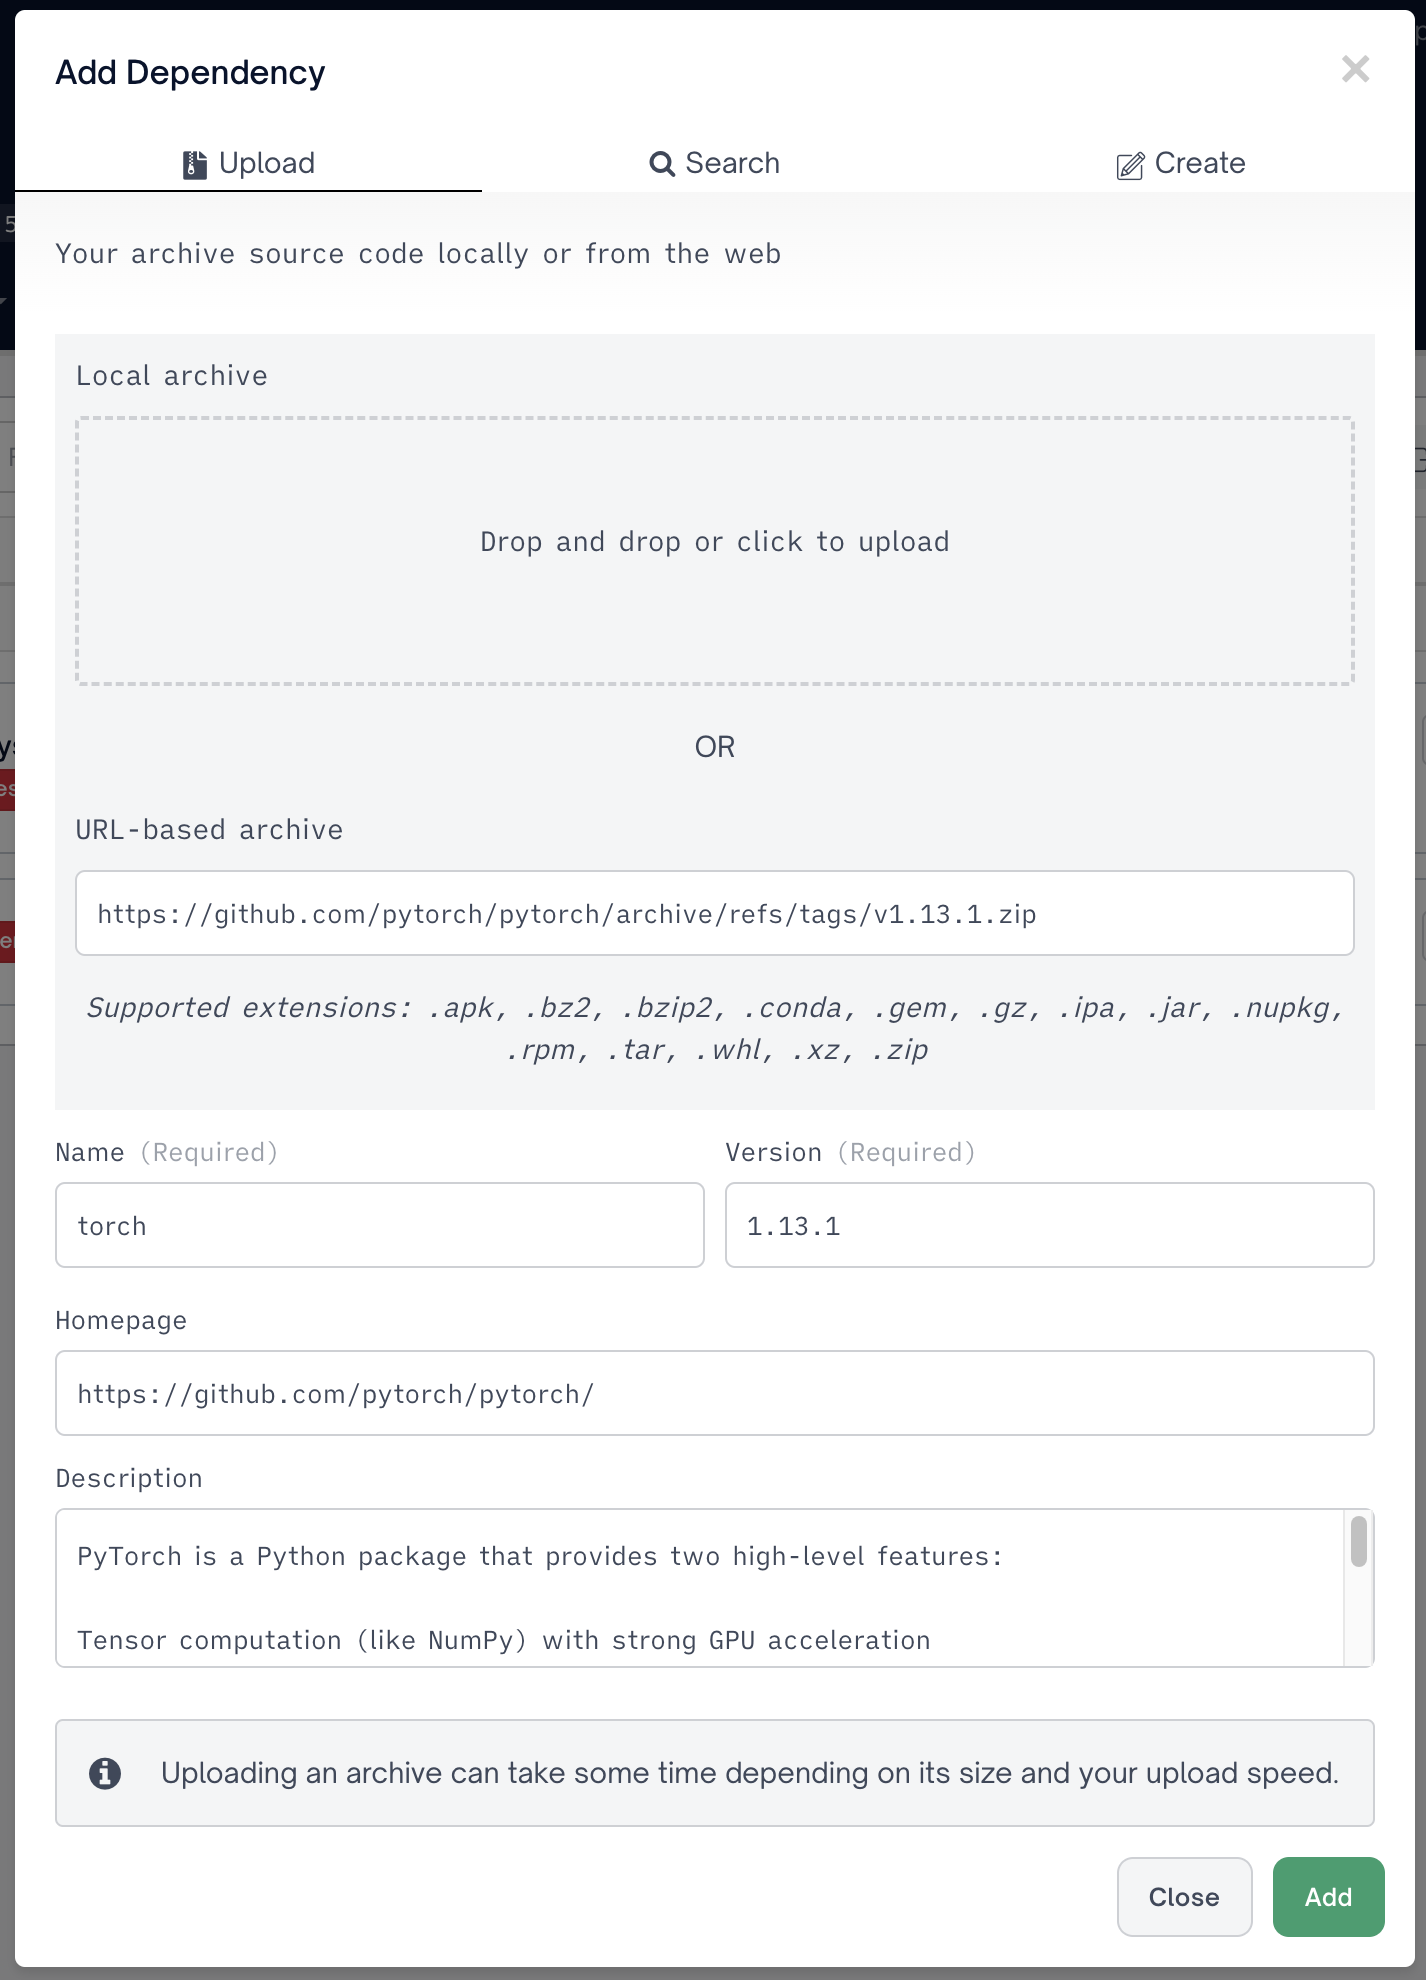
- In the modal, you should fill out the fields as completely as you can, this information will be viewable from the Web UI after the dependency has been added to your Project. Above, you'll see I've found the appropriate GitHub release for the dependency
torch.Tips- Using the URL is the preferred method here - it tends to be faster than uploading the archive yourself.
- You can typically find a compressed version of the source from the "Releases" or "Tags" on a project's GitHub Page.
- When using a PyPI dependency, you can also use the URL to the
.whlfile if no source is available.
- After you've finished, you can click "Add" in the bottom right of the modal, and your dependency will be added to your project, get queued, and finally be analyzed:
](https://files.readme.io/6b46839-Incomplete_Dependencies_08_Analyzing_Build.png)
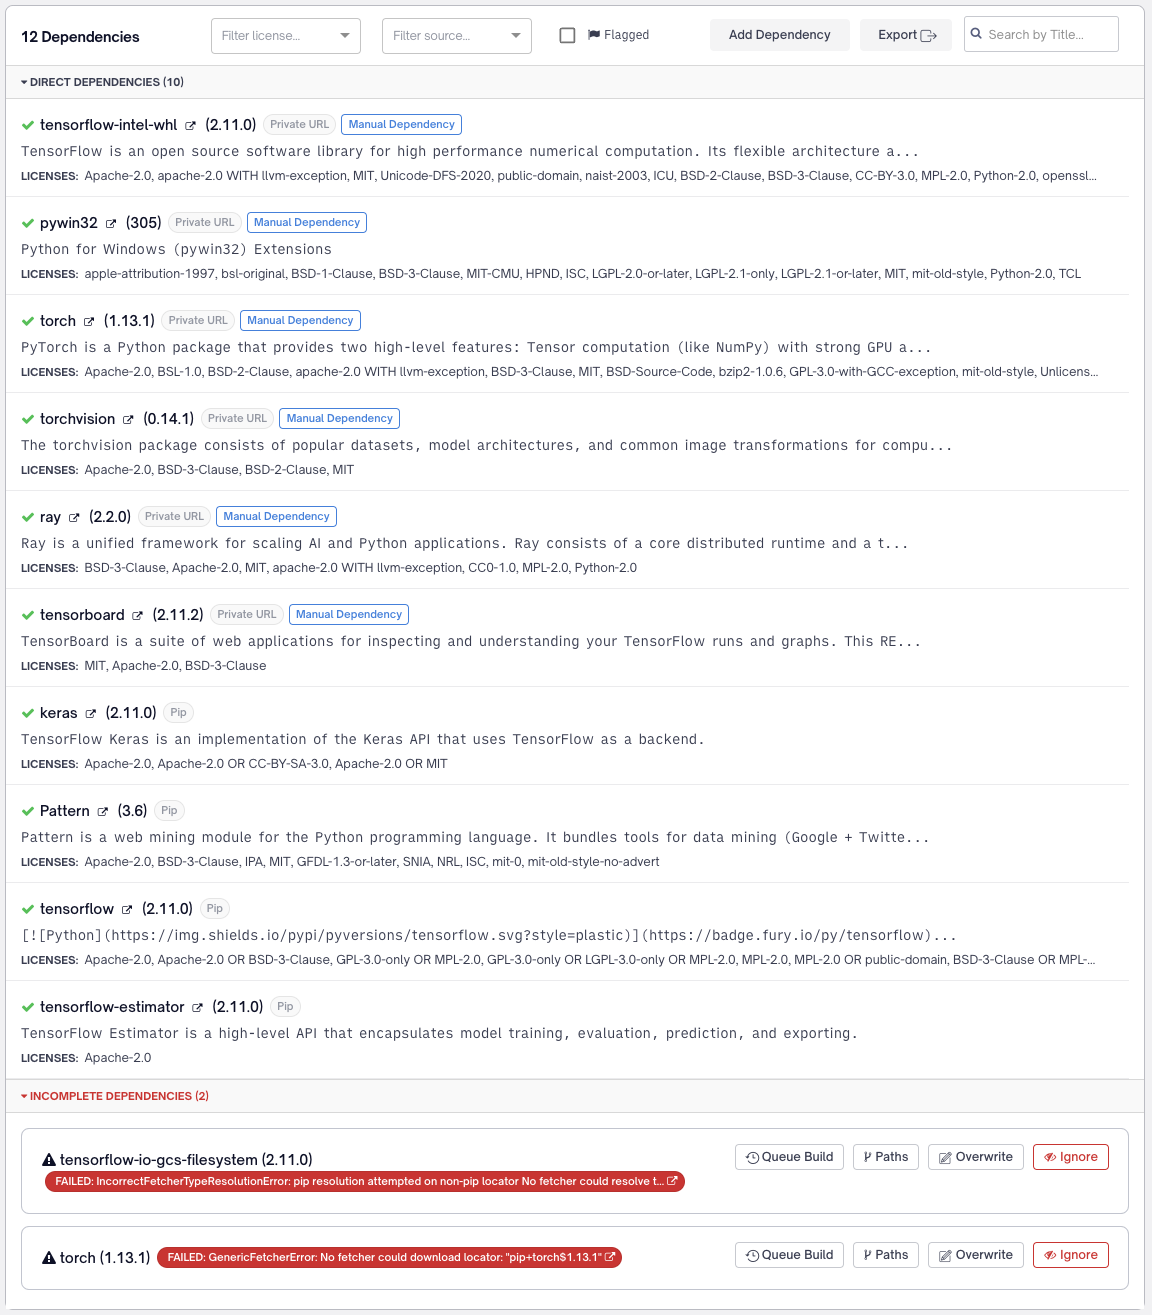
*Note that there are two versions of torch here. this is because when adding a dependency, it does not associate itself with an existing unknown dependency. To remove the unknown dependency, please refer to Overwriting an Unknown Dependency
- You can see below that
torchhas been added, and the existing unknown ("Incomplete") version, remains.
Updated 3 months ago
