

GitLab
Connect a self-hosted GitLab instance to FOSSA On-Prem for project import and PR checks.
Enterprise feature
Adding self-managed GitLab instances requires a paid FOSSA SaaS plan and must be enabled by your FOSSA account team.
Overview
Note
FOSSA connects to GitLab.com out of the box, so users can sign in with GitLab immediately with no configuration. This guide covers two scenarios: (1) adding a self-managed GitLab instance from the FOSSA SaaS settings UI, and (2) integrating a self-hosted FOSSA appliance with a self-hosted GitLab instance behind the firewall.
Adding a self-managed GitLab instance (SaaS)
If you run FOSSA SaaS but your code lives on a self-managed GitLab instance (e.g., gitlab.yourcompany.com), you can add that instance from your organization settings; no on-prem FOSSA deployment required.
- 1
Open GitLab integrations
Go to Settings → Integrations → GitLab.
- 2
Add an instance
Click Connect to GitLab and enter the base URL of your self-managed GitLab (for example,
https://gitlab.yourcompany.com). - 3
Register FOSSA as an OAuth application
In your self-managed GitLab instance, navigate to Admin → Applications and create a new application with:
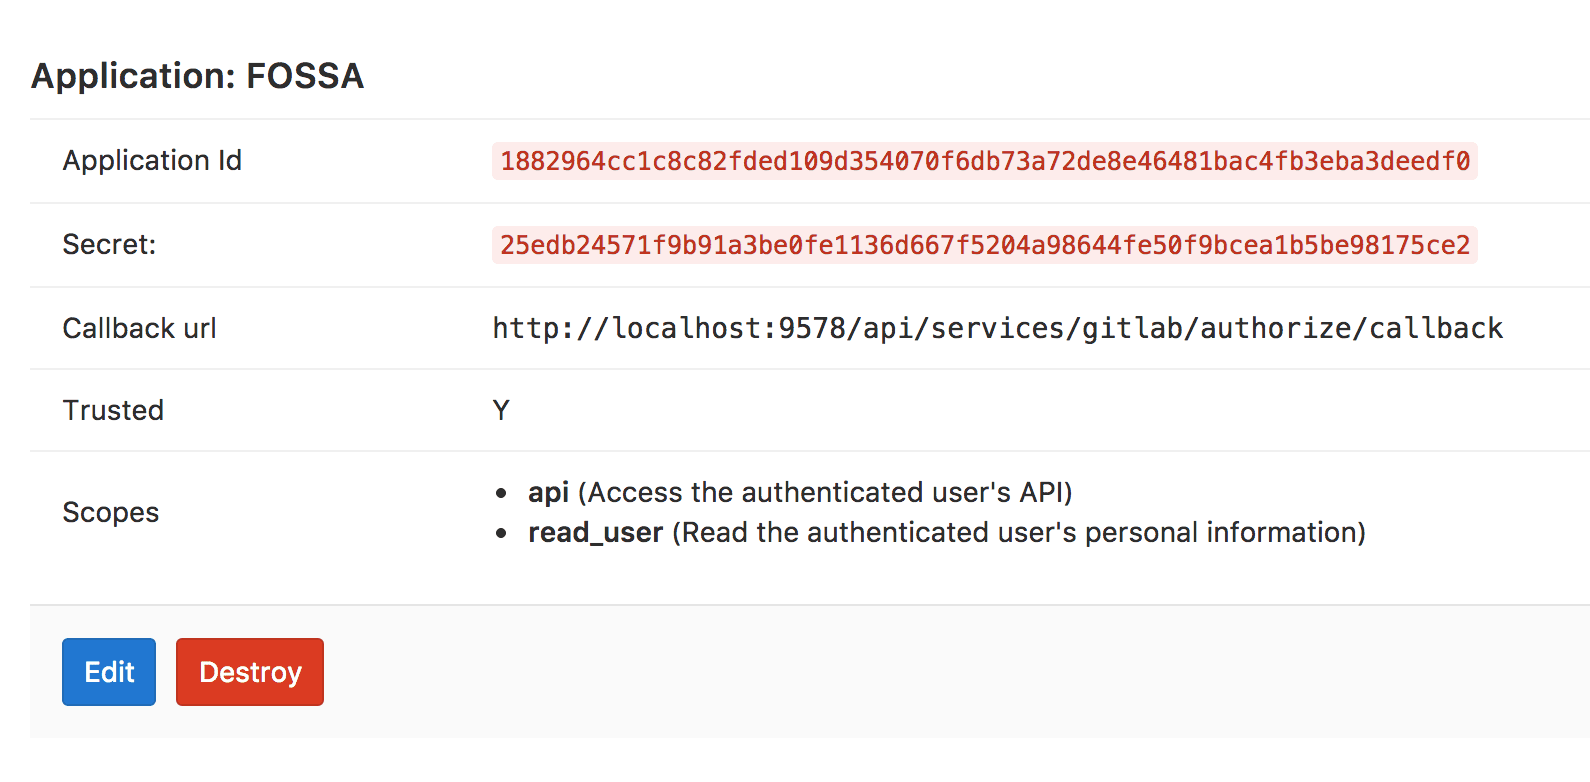
Field Value Name FOSSARedirect URI The callback URL shown in the FOSSA settings UI Scopes read_user,read_api,read_repositoryCopy the Application ID and Secret after saving.
- 4
Enter credentials in FOSSA
Back in FOSSA, enter the Application ID and Secret from the previous step, then click Save.
- 5
Connect user accounts
Users who want to import from this instance must connect their GitLab account once. They will be prompted to authorize FOSSA when they first try to import a project from the new instance.
After setup, users can import repositories from your self-managed GitLab instance in the same flow as GitLab.com.
Connecting GitLab to FOSSA on-prem
- 1
Register FOSSA as a GitLab OAuth application
Sign in to your GitLab instance with an administrator account and navigate to:
{GITLAB_HOST}/-/profile/applications(For older GitLab versions:
{GITLAB_HOST}/profile/applications)Or go to User Settings → Applications → Add New Application.
Fill in the application details and save.
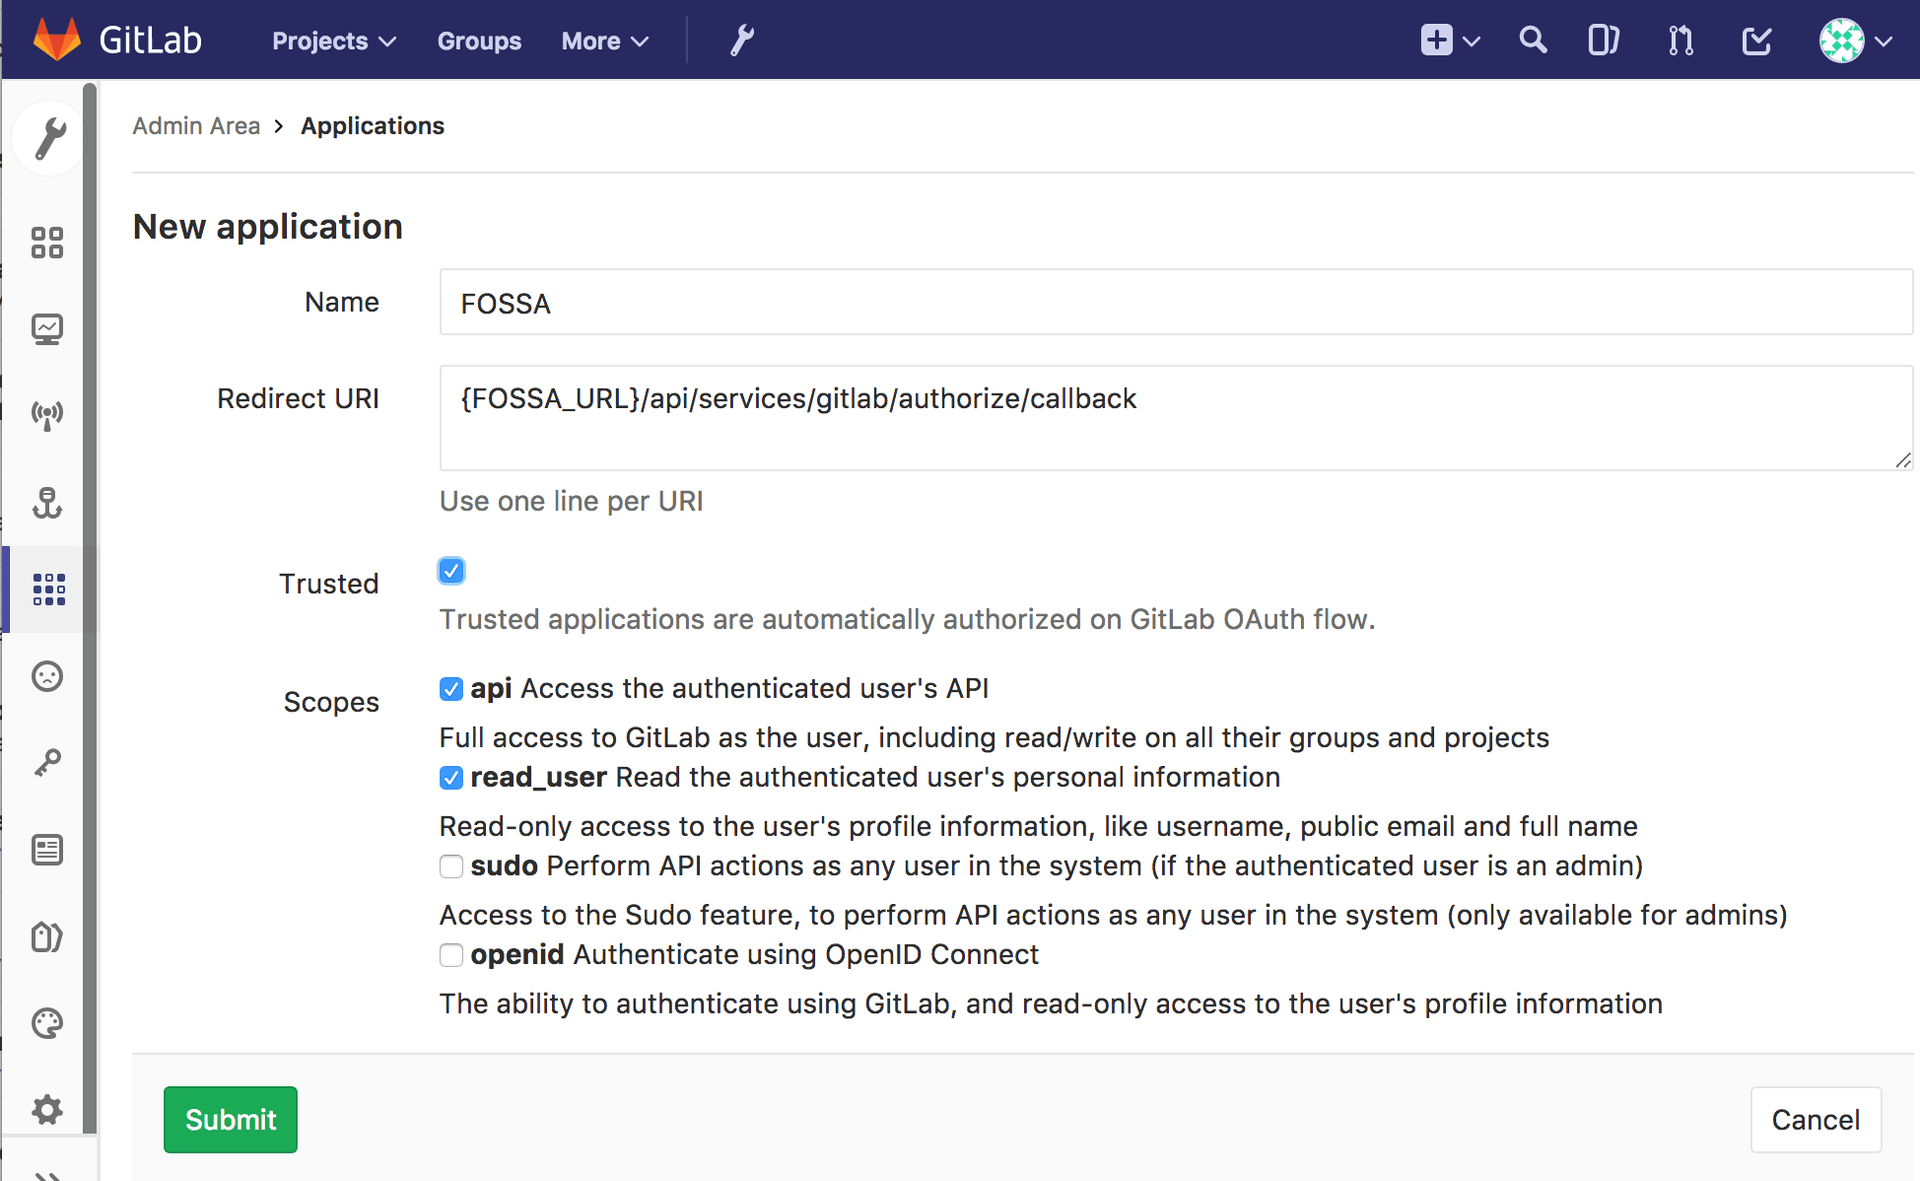
After saving, GitLab shows the Application ID, Secret, and Callback URL. Copy all three; you will need them in the next step.
- 2
Add GitLab credentials to FOSSA
SSH into the FOSSA appliance and edit
config.env. Add or update the following:Shell# Base configgitlab__enabled=truegitlab__base_url={GITLAB_HOST} # Credentials from the previous stepgitlab__credentials__oauth2__client_id={APPLICATION_ID}gitlab__credentials__oauth2__client_secret={SECRET}gitlab__credentials__oauth2__callback={CALLBACK_URL}Replace
{GITLAB_HOST}with your GitLab instance URL (protocol included, e.g.https://gitlab.yourcompany.com). - 3
Restart FOSSA
While still in your SSH session, run:
Shellfossa restartWait for FOSSA to finish booting. Users can now sign in with their GitLab accounts and import repositories.
What's next
- CI/CD Scanning: run FOSSA analysis automatically on every push from your GitLab repositories.
- PR Checks: surface license and vulnerability issues directly in GitLab merge requests.
- Fail CI/CD Checks: block merges when FOSSA detects policy violations.