Import Binaries
Enterprise FeatureThis feature is only available in a FOSSA Enterprise subscription. Contact [email protected] for more details.
New Binary Decomposition
Once logged in, you are ready to import your Binary project(s).
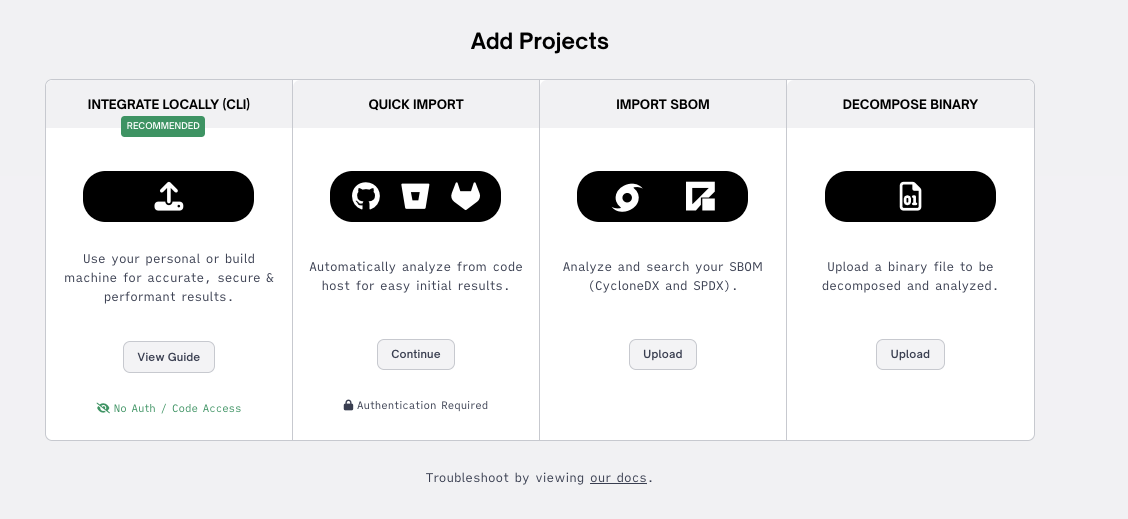
From the Add Projects page, you have the option to Decompose Binary

Supported Formats
File Type (mime type) | File Extension | N-Day / SBOM |
|---|---|---|
Analyzable | Android Dex | .dex |
Analyzable | Android ODEx | .odex |
Archive | AR | .a, .ar, .deb, .lib |
Archive | arj | .arj |
Archive | bzip2 | .bz2, .tbz, .tbz2 |
Archive | Cab | .cab, .msu |
Archive | Compound types | .msi, .msp |
Archive | Cpio | .cpio |
Archive | cramfs | .cramfs |
Archive | Docker container | .tar.gz |
Archive | Ext2 | .ext2 |
Archive | Ext3 | .ext3 |
Archive | Ext4 | .ext4 |
Archive | FAT | .fat |
Archive | GZIP | .gz |
Archive | HuLinux | .hfs, .hfsx |
Archive | Jar | .jar, .war, .ear |
Archive | LZ4 | .lz4 |
Archive | Lzip | .lz |
Archive | LZMA | .lzma |
Archive | LZOP | .lzo |
Archive | Mach | .mach |
Archive | NTFS | .ntfs |
Archive | RPM | .rpm |
Archive | RAR | .rar |
Archive | Roff | .man, .roff |
Archive | RPM DB | .rpmdb |
Archive | RPM sign | .sig |
Archive | SFS | .sfs |
Archive | SquashFS | .sqsh, .squashfs, .sfs, .sqf, .sqfs, .sqs, .squ |
Archive | Tar | .tar, .ova |
Archive | upx | .upx |
Archive | VMDK | .vmdk |
Analyzable | Windows dynamic linked library (application/x-dosexec) | .dll |
Analyzable | Windows executable (application/x-dosexec) | .exe |
Archive | Windows Image Format | .wim, .swmnote |
Analyzable | Windows object file | .obj |
Analyzable | Windows registry hive | |
Analyzable | Windows UWP/AppX package manifest | AppxManifest.xml |
Archive | Xar | .xar, .pkg |
Archive | Xz | .xz, .txz |
Archive | ZIP | .zip, .ipa, .xpi, .vsix, .whl, .apk |
Archive | 7z | .7z |
Analyzable | Firmware files | File Formats: SREC, bFLT, base64, Intel HEX, uBoot, wim |
Each new revision is carried out on a single uploaded file (artifact): either a binary, or an archive.
Maximum file sizes are as follows.
- ISO files containing uncompressed data up to 40GB (where 1 GB = 1,073,741,824 bytes - note that the user interface displays file sizes in base-2 format).
- Archive file types with compressed data (whether uploaded directly or extracted from an archive): up to 7GB.
Uploads via the user interface must complete within 2 hours, otherwise the upload will fail. - Analysis target (whether uploaded directly or extracted from an archive): 200 MB.
Archive files may contain any combination of archive file types and analyzable binary file types.
- Only ZIP files using standard 'deflate' or 'store' compression methods are supported. Use standard system zip utilities in preference to WinZip and similar tools.
- FOSSA will respect permissions set on objects in the archive: make sure all files and directories are readable by all users.
- The combined size of an archive file and its expanded contents must not exceed 17.5 GB.
- Do not use encrypted ZIP files.
- The maximum directory depth is 400. After this limit, files and directories will be omitted.
- Archive file extensions must be as shown. If necessary, rename your archive file before uploading.
- Analyzable binary file names do not require a specific extension. However, they cannot have a file extension that would normally be associated with a nonexecutable file.
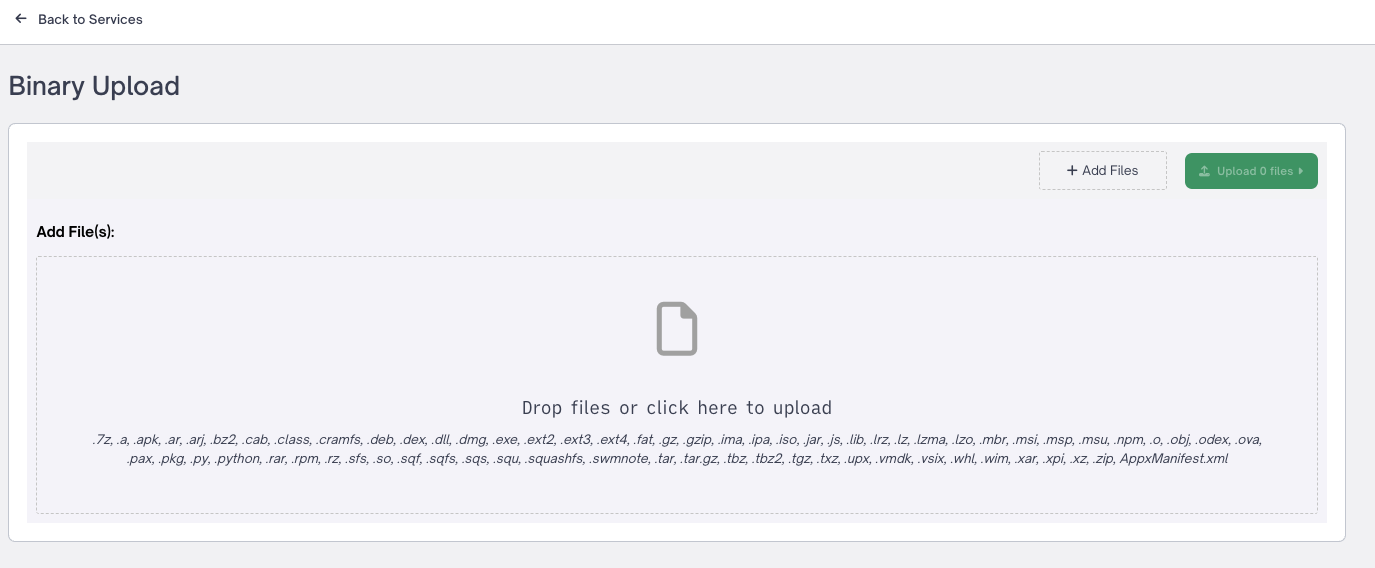
Next, select Add Files and select your desired SBOM file (.json or .xml) to import
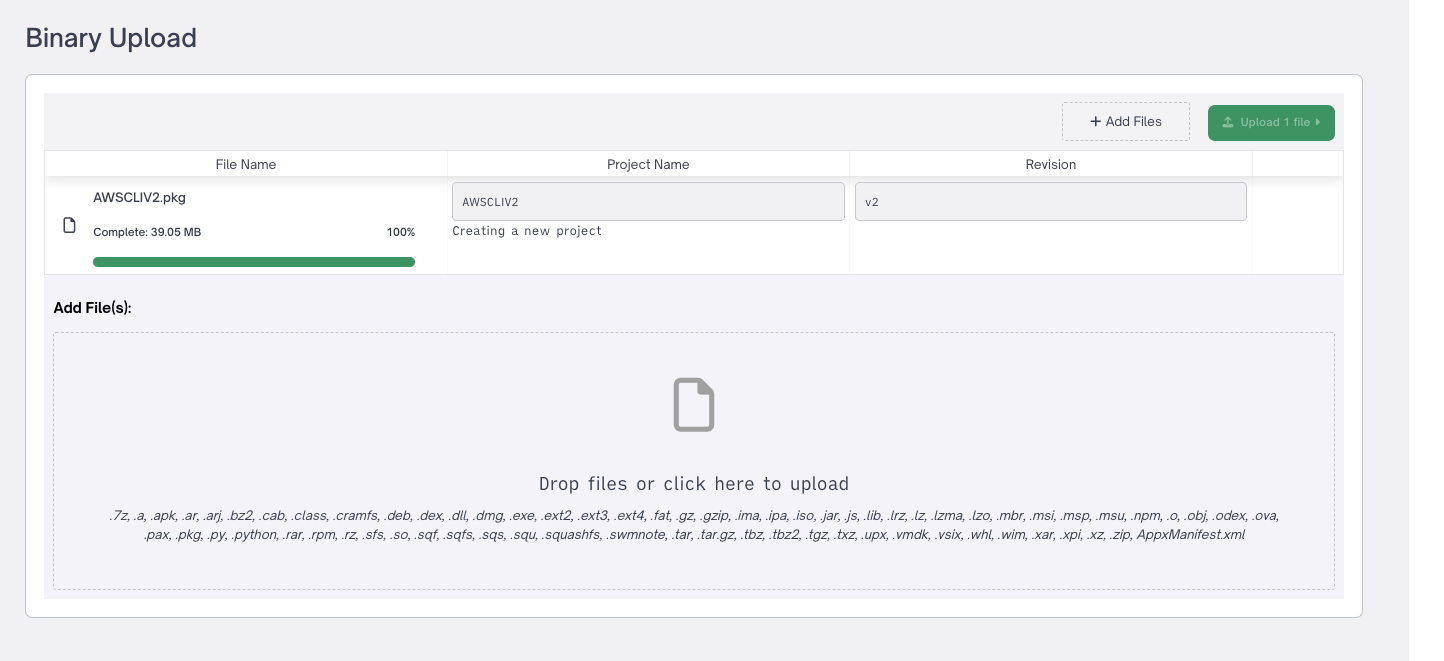
TipBulk Binary import is supported, select as many files as desired

Add a unique name and applicable semantic version number
NoteProviding an existing Binary project name will add the Binary as the latest revision to the existing Binary project.

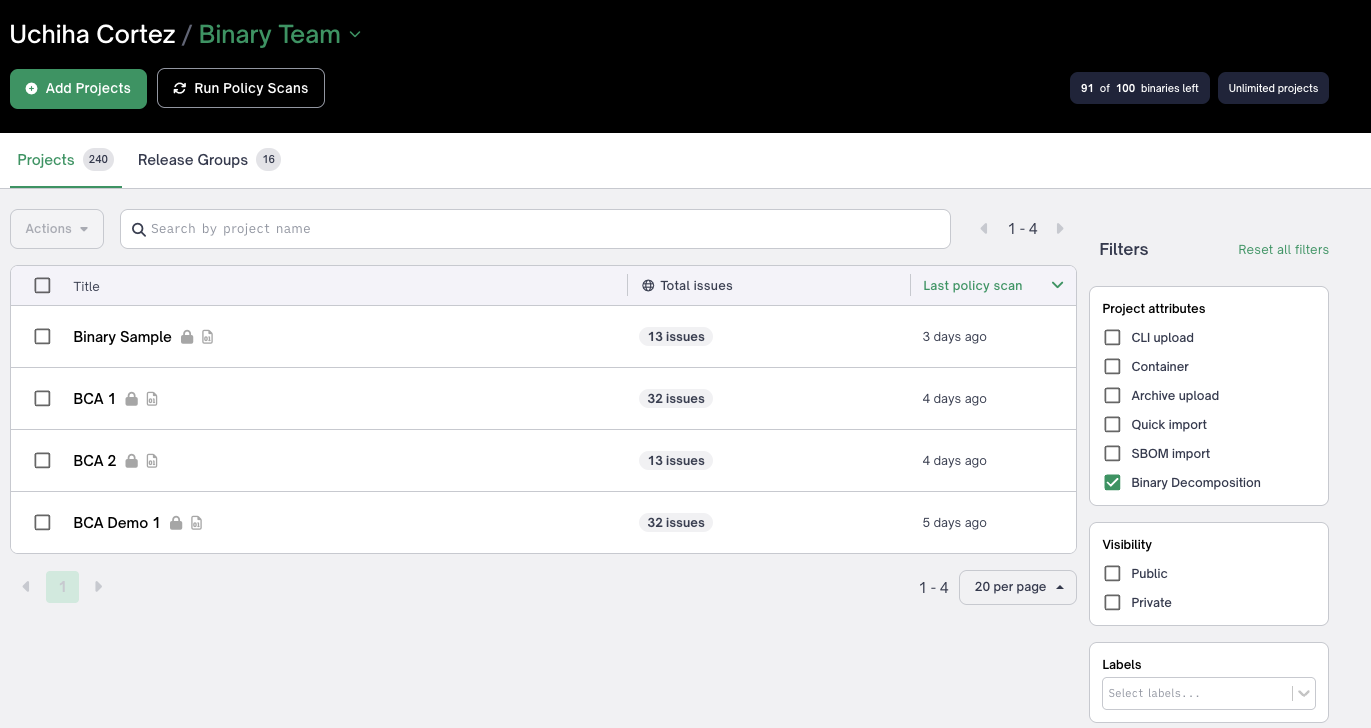
Once uploading and analyzing the file is complete you will see your Binary appear in your Projects list. You may choose to use the Binary Decomposition project filter to quickly filter to your existing binary projects.

Project List
TipNotice all Binary projects will have the Binary Decomposition icon denoted next to them
You may choose to upload a new binary as a new revision to any Binary project.

Updated 2 months ago
